
Magnolia Lane
Layout
By Sue Smyth

Hi Bloggers
Today I am sharing a sweet layout, using Magnolia
Lane papers and embellishments.

I really wanted to share how beautiful and versatile
the bling pack is.

And also how the papers are fantastic for
fussy cutting.

The generous rhinestone and pearl
swirls, make the perfect accent to the
corners of the photo.

Once I have fussy cut the flowers, I have
adhered them with 3 D foam tape for
a wonderful dimensional effect.

Don't be afraid to snip up your rhinestone
swirls to suit your layout, you can
easily remove any pearls or rhinestones
you do not want and use them in other places.

The gorgeous cabochons, sit perfectly in the smallest
scalloped oval die cut. Sometimes I like to
add a little metallic gold paint to the edges of the oval to
frame the cabochon like a trinket

Step 1
I like to adhere my patterned paper to a 12 x 12 chipboard
sheet to make it sturdy and durable.
Then to add to the shabby appeal, splot
gold, vintage pink and teal spray mists
across the area you will place the photo.

Step 2
Trim out 2 of the postcards, distress edges and blend
Victorian Velvet around the edges too. When you
are happy adhere them to the background, layering
over top of each other.

Step 3
Snip up the rhinestone swirls, do not remove
from the acetate backing, until you are really
ready to adhere them in place.
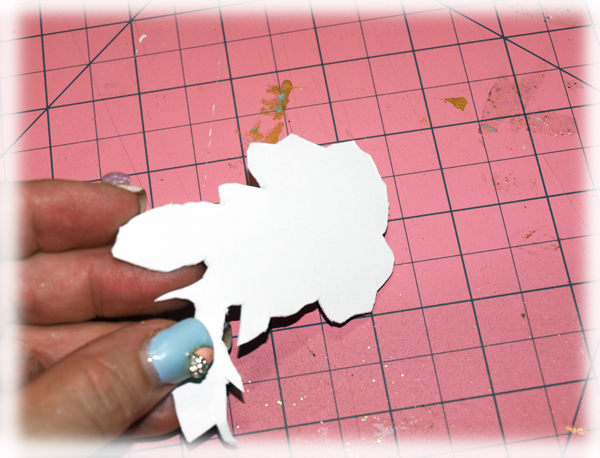
Step 4
I like adhere all my fussy cut pieces to
scrap cardstock first, roughly
cut the image you want, then adhere to
scrap card with a glue stick. Then go
ahead and fussy cut the image with
cardstock adhered.
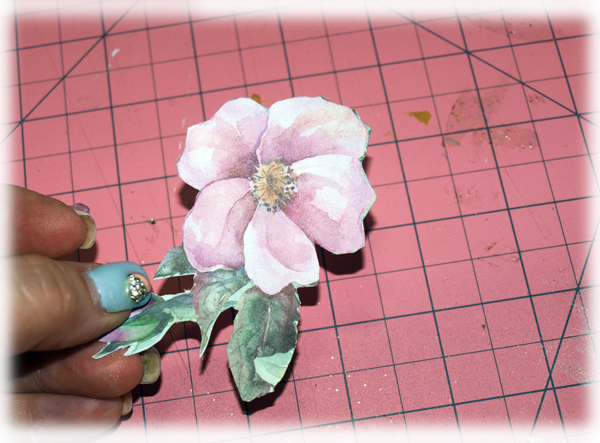
Step 5
This then creates a sturdy image that can
be affixed with 3 D foam tape. It prevents
sagging and tearing and give the images impact.

Step 6
Arrange all of your elements around and under you photo
before adhering down, play with placement, until you
are happy. I like to take
a photo with my phone then, to use as a
reference for placing each layer in
exactly the same way.
Ultimate Crafts Products
C0724633 Couture Creations Snow White 3 mm pearls
Happy Crafting!


