Mechanical Seahorse Box - Sue Smyth
Hello Crafters
I am so delighted to join the awesome Dusty Attic team, as a long time fan of Dusty Attic and of chipboard I cannot wait to create some loveliness for you all. My first project is an altered box, one of those sturdy ones that come with your Ipad. I love to alter and repurpose, so of course chipboard is great for that, as it does not add too much weight or height to a project, therefore it is still very useful and not heavy.
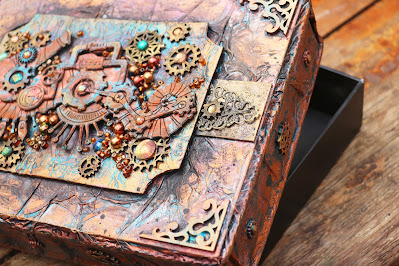
The first thing I did with this box is cover it in scrunched up tissue paper, one of my favourite things to use, a simple way of adding texture and it allows the paint to grab and stay put. Of course I adhere the tissue with gel medium, as this allows a certain flexibilty when dry and is great for items that will be used a lot.

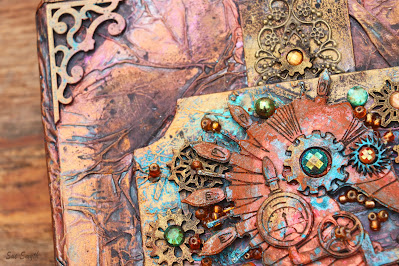
I love layers as you might tell, so I've painted the Seahorse and added lots of layers, I have started with black gesso, then some brown paint, then I have rubbed in patches of copper metallic paint (inka gold if you have it) then to add contrast,. Each time I allow a little of the previous layer to show through, a dry brush or rubbing with your fingertip is best for this. Mix up a batch of watery turquoise metallic paint, then flick over the entire seahorse. To finish, I have applied a little orange/rust paint, which I have mixed with a little baking soda (or baby powder) for texture. this resembles rust and corrosion, which is great in this project. I like to mix up enough and store in a jar for use in the future.
Here are a few neat close ups of the seahorse head. I have placed him on a panel to give some definition, and raise him up. The panel has texture paste applied with our cog stencil. When dry, I have painted it with black gesso, then the turquoise metallic paint and then rubbed over with Prima Vintage gold wax (love this stuff ) it turns any chipboard into a neat metal finished piece.
On the edges a nifty Dusty corner set fits nicely and I have used some of our cog sets around the Seahorse. All of these have layers of first black gesso and then metallic paints of your choosing. I also love a bit of bling and detail, so around the seahorse I have clustered some shiny beads and seed beads, the best way to adhere these is with a type of dimensional magic, as it drys crystal clear it will not mark the beads, also as it is self leveling the excess glue will puddle under them and dissappear.
Now I can use a box that was destined for the bin to store things in like remotes, treasures, photos or letters
Here are some of the Chipboard pieces I have used
Thanks for visiting the blog today
Happy Crafting
Sue Smyth


