Friday, May 4, 2012
yellow brick road
This a combination card and Off the page, inspired by the Crafty Secrets Wizard of Oz and using Graphic 45 Wizard of Oz papers. I love making these little tactile books that, allow you to really explore techniques and skill. They are then little keepsakes, that one day my children and grandchildren will cherish. These sort of projects are also really great for a special birthday for great friends, don't do them for people who do not appreciate what you do lol. And I know people who do these projects for people with cancer and very ill, it is a lovely thing to look at while in hospital.
I have just finished a class at Paper Trenz on this, and now have scheduled a similar project about Alice in Wonderland.
Friday, April 27, 2012
mixed media canvas
Today I will share with you a mixed media canvas I finished a few weeks ago. It is really four small canvases joined together ( hammer and nails and hubby here) then I have prepped it with brown paint, and proceeded to decorate and scrap on the reverse side, which creates four little cavities to use. I have gone for a very busy look here, but pulled it together with red velvet glimmer mist. Every thing was sprayed with this (with in reason) so that the embellishments and flowers work as a cohesive whole and do not clash. You can use up all your old flowers and trinkets, even chip shapes, if you spritz them with the glimmer mist. I love that I have been able to use product I have had for a long time, kind of like tiding up and creating at the same time :)
Thursday, April 19, 2012
black lace layout
My blog is a little early, but I am up to my ears in work at the moment and wanted to get it out of the way.
This layout shows how you can use plain cardstock and make your own pattern, with a piece of lace curtain and black spritz. Sometimes I mix my own, if I dont want sparkle and glimmer in it(hard to believe i know).
I saw a dress in a shop with pale pink and a black lace overlay and this inspired me with this layout. The combo works well together and just right for vintage pages.
These two girls are relatives, but I dont know just where they fit in the family as it is so long back lol
I have made some flowers using rose creations to cut out mulberry paper and pink organza.(the organza takes a bit of effort to cut out, but is worth it in the end) I then heat the organza with heat gun to scrunch up the petals. Also I have cut some pink velvet into circles, and carefully edged them with white dimensional paint and sprinkled white glitter over them, add a nice center and this makes a lovely simple flower, too
I have added a piece of Dusty Attic chip as a vine and the new antique frame from spellbinders(this is embossed in gold)
hope you are inspired!!
Friday, April 13, 2012
Dusty Attic peacock feathers
I don't usually do layouts of myself, but I really wanted to use the Dusty Attic peacock feathers, in a layout. My photo was the only one that seemed to suit. The combination of colours in my shirt, match the same colours in the feathers and the flowers.
To colour the feathers, I have painted with gesso first, then tapped with distress ink(peeled paint and stormy sky) then I have applied versamark and clear embossing powder, heat set this and the colours swirl and mix, it is neat.
then to give more colour the the top of the feather I have used lumieres and glitter. It is really up to you, you can use a combination of these techniques until you get the look you are after.
The flowers are made from Maya Rd, taffeta ruffle ribbon, coil it up on a circle of cardstock, covered in double sided tape, then heat with the heat gun, the ruffles will curl up and look more like a flower this way.Hot glue some stamens or a centre, and all will keep in place nicely. You can also spritz it with a little glimmer mist.
Friday, April 6, 2012
HAPPY EASTER
HAPPY EASTER everyone, I have shared a photo of the easter baskets I am making for this
year, 25 of them, so I keep it relatively simple (you laugh I can hear you!) I fill them
with homemade chocs(some bought) and sugar cookies. My daughter and I were up late last night icing our bunnies and
chick, of course she puts more sprinkles on hers and the kids she likes. Sadly I think we will
have to make some more, because there is none left for us.
Also over the break I have been putting up new shelves in my Space(well hubby has, and I have a beautiful
fully lined wall. I think I will have to share this too.
It is all Michelle Grants fault,(see her work in our issue 14 Australian Scrapbook Ideas), she has a great tour of her space on her blog michellejbg and it inspired me to
tidy up, one thing led to another and before you know it I had my hubbie running for cover(as he hates working with wood)
as I explained I wanted wall to wall shelving. But a bribe(bottle of scotch)and a visit to hardware later,he was happy to indulge me...tee hee
Also I am off to the New Paper Trenz today in Wynnum for a class
the first in the new digs, with a brand new roomy workshop, the first of many I hope.
see you all there, it is going to be a great new look, and wonderful store, under the guidance of lois.
Thursday, March 29, 2012
Special Girl
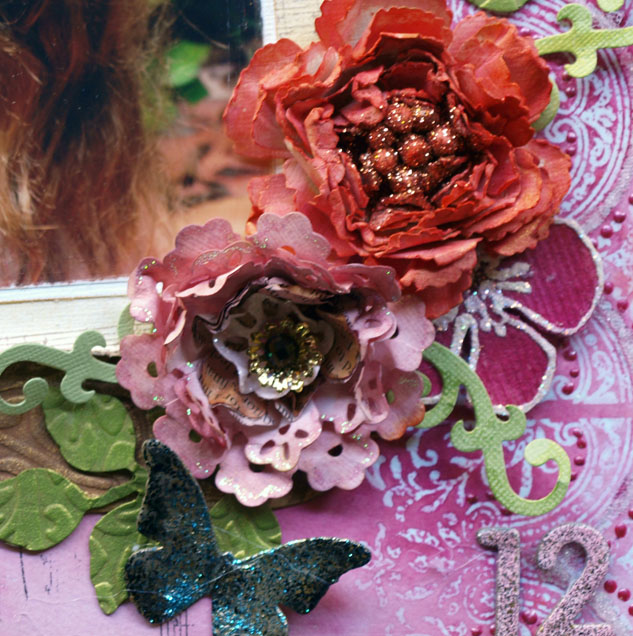
The stamp resist method works really well with the large stamps from Stampendous, love the lacey look, and of course using lots of glimmer mists. Here I have made the flowers with Grand Peony, and spritzed it with Oriental poppy glimmer mists, the centre of the flowers are simply cotton buds, glimmer misted too and chopped off at the necks (poor things) and hot glued in place, sprinkle a bit of glitter and you have lovely dimensional flower. the other flowers are made from the floral doily accents and cardstock with a mix of old book pages, I love mixing the layers to create unique flowers. My daughter here has quite red hair, it is not really, it is actually more honey blonde, but my Scottish grandmother would be smiling right now, she always wanted a grandchild with red hair! Why I do not know!!!lol
Friday, March 23, 2012
bicycle wheel
I promised some of you would share these photos of a recent project, and here it is
I have recycled an old bicycle wheel, It did not cost me anything, but I did spray it with matt black paint and stamped the edges with gold paint, I have wound red fibres around the outer edge.
once all that was done, I made some mulberry paper flowers to decorate the edge.
They are my favourite thing at the moment, so easy to do as you can cut all the layers just about at once, then quickly insert a brad, spritz with water and scrunch up. dry them off with a heat gun and spritz with glimmer mists to alter the colour. cos lets face it mulberry paper, usually does not come in great colours.
For the banner, I have glued old book pages to a stiff piece of cardstock(just join it to make a long scroll) with mod podge or gel medium. I have used Graphic 45 metal pegs but you could use wooden pegs and spray paint them black and smear them with gold paint.
what I really like about this project is that you can change the photos anytime you want as the kids grow up. I have had all the photos printed in sepia to match the theme I used, but I can change them if I want. Luckily I found the stand at a cheap shop, but you can hang this on the wall too.
Subscribe to:
Posts (Atom)