Welcome to my Blog

Welcome everyone, I hope to inspire you and share some of my papercraft work. You can find out where I teach and what I am up to, what inspires me and what I am working on next. I love to share new ideas and neat ways of adding creativity to your pages or cards etc

my blog

Saturday, August 19, 2023

Mechanical Seahorse Box - Sue Smyth 

Hello Crafters 

I am so delighted to join the awesome Dusty Attic team, as a long time fan of  Dusty Attic and of chipboard I cannot wait to create some loveliness for you all. My first project is an altered box, one of those sturdy ones that come with your Ipad. I love to alter and repurpose, so of course chipboard is great for that, as it does not add too much weight or height to a project, therefore it is still very useful and not heavy.

The first thing I did with this box is cover it in scrunched up tissue paper, one of my favourite things to use, a simple way of adding texture and it allows the paint to grab and stay put. Of course I adhere the tissue with gel medium, as this allows a certain flexibilty when dry and is great for items that will be used a lot.


I love layers as you might tell, so I've painted the Seahorse and added lots of layers, I have started with black gesso, then some brown paint, then I have rubbed in patches of copper metallic paint (inka gold if you have it) then to add contrast,. Each time I allow a little of the previous layer to show through, a dry brush or rubbing with your fingertip is best for this. Mix up a batch of watery turquoise metallic paint, then flick over the entire seahorse. To finish, I have applied a little orange/rust paint, which I have mixed with a little baking soda (or baby powder) for texture. this resembles rust and corrosion, which is great in this project. I like to mix up enough and store in a jar for use in the future.


Here are a few neat close ups of the seahorse head. I have placed him on a panel to give some definition, and raise him up. The panel has texture paste applied with our cog stencil. When dry, I have painted it with black gesso, then the turquoise metallic paint and then rubbed over with Prima Vintage gold wax (love this stuff ) it turns any chipboard into a neat metal finished piece. 


On the edges a nifty Dusty corner set fits nicely and I have used some of our cog sets around the Seahorse. All of these have layers of first black gesso and then metallic paints of your choosing. I also love a bit of bling and detail, so around the seahorse I have clustered some shiny beads and seed beads, the best way to adhere these is with a type of dimensional magic, as it drys crystal clear it will not mark the beads, also as it is self leveling the excess glue will puddle under them and dissappear. 


Now I can use a box that was destined for the bin to store things in like remotes, treasures, photos or letters 

Here are some of the Chipboard pieces I have used 


Thanks for visiting the blog today 
Happy Crafting 
Sue Smyth 


Wednesday, January 16, 2019

sues favourite projects


My Favourite 5 Projects for 2018

This has been a busy year for me, with a lot of my projects being 
taught around Australia, many times I have a favourite or two, but it can be really
hard to choose as they are all my fav when I create them, until something 
better comes along lol.


My first choice is a Dragon Journal, I taught in Tasmania first
they love dragons there lol.


I just loved the texture that is revealed with Art Alchemy waxes 
 he is so detailed and therefore stands out despite being small. 
I have added lots of seed beads and rhinestones as dragon 
treasure. I also love the lashing on the sides, it gives
the book so much character.


My next project is a special one to me as I hand made the 
elf face with resin (made my own mold)
I love the fairie world as when I was a child
I was given a realistic fairie book that inspired me for years and still 
does, this is an altered book about Spriggans.


I chose this one because it features one of my favourite color combos,
the contrast of clear teal and ruby red 
It also includes the Vaseline technique to create the rustic 
palings, and has a more shabby chic feel than I usually do.  I have 
taught this project many times and it is always popular.


Adding lots of shine baubles increases the sense of light and movement
I have created a gorgeous cluster with 
I D chipboard as the base.


This project was for the Brisbane Scrapbooking Expo and it
was well received, it became my favourite of the 4 projects
 I did, as it had a few different techniques included in it,
 I just love the little sleeping baby, and 
the wrinkled scrunched paper.


He sits in a little ID frame for his bed, snuggled 
in muslin moss with wings unfurled.


My last project is The Mad Hatters Tea box, another 
popular class, that I just may have to do again this year.
I love the Alice in wonderland books/movies and love using it 
as a theme.


Again gorgeous I D chipboard creates a framework
for a nifty resin Mad Hatter, my favorite set of 
colours again, teal and ruby red, along with the 
striking addition of playing cards. This makes 
a wonderful gift for someone, though I think
most of my students kept it for themselves lol.


Happy Crafting and 
look forward to an inspirational 2019

Friday, December 21, 2018

December cheer


Christmas Cheer Journal and
keepsake box 


I love a good journal, and use them all the time, so earlier in 
the year I created this one for Christmas in July. I have 
also taught it around Australia, but now 
will share with you a quick tutorial on how I created it.


I just love to team turquoise and teal together, for me, just add in 
some white snow and it shouts of Christmas 


And of course some glitter and shine, here I have 
used the red beaded trim you can buy at Christmas
simply snip it up it to individual balls. I buy
them in all colours and use them 
year round.


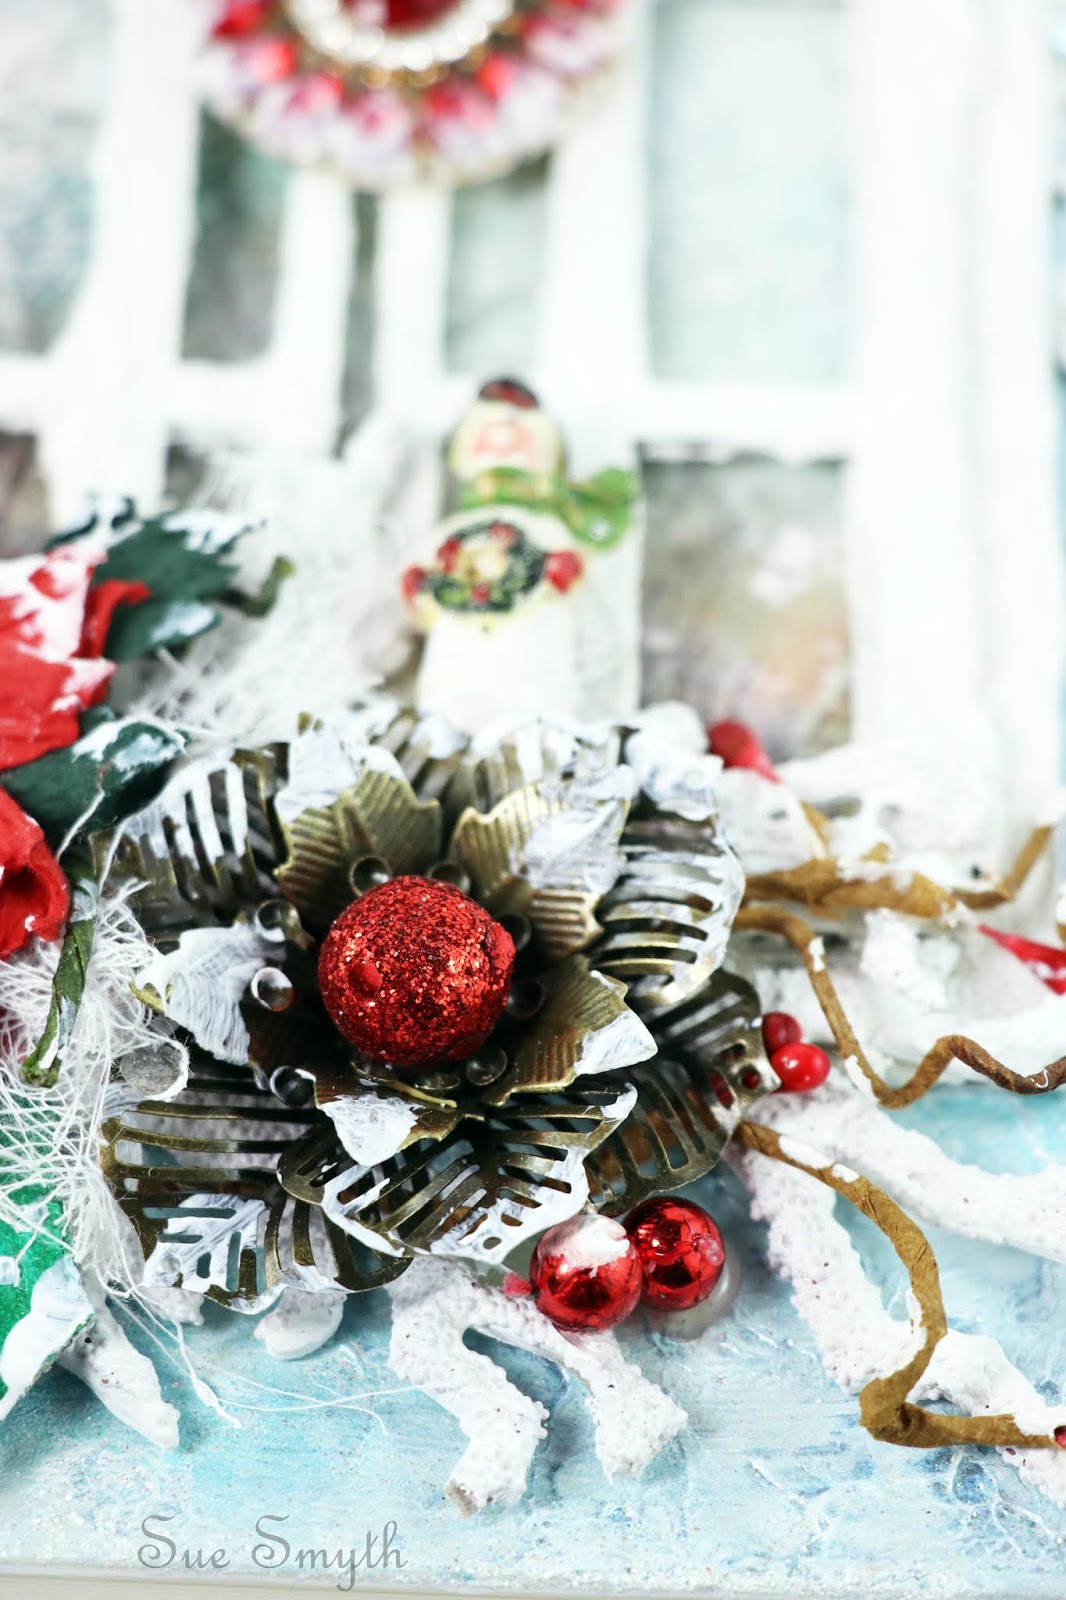
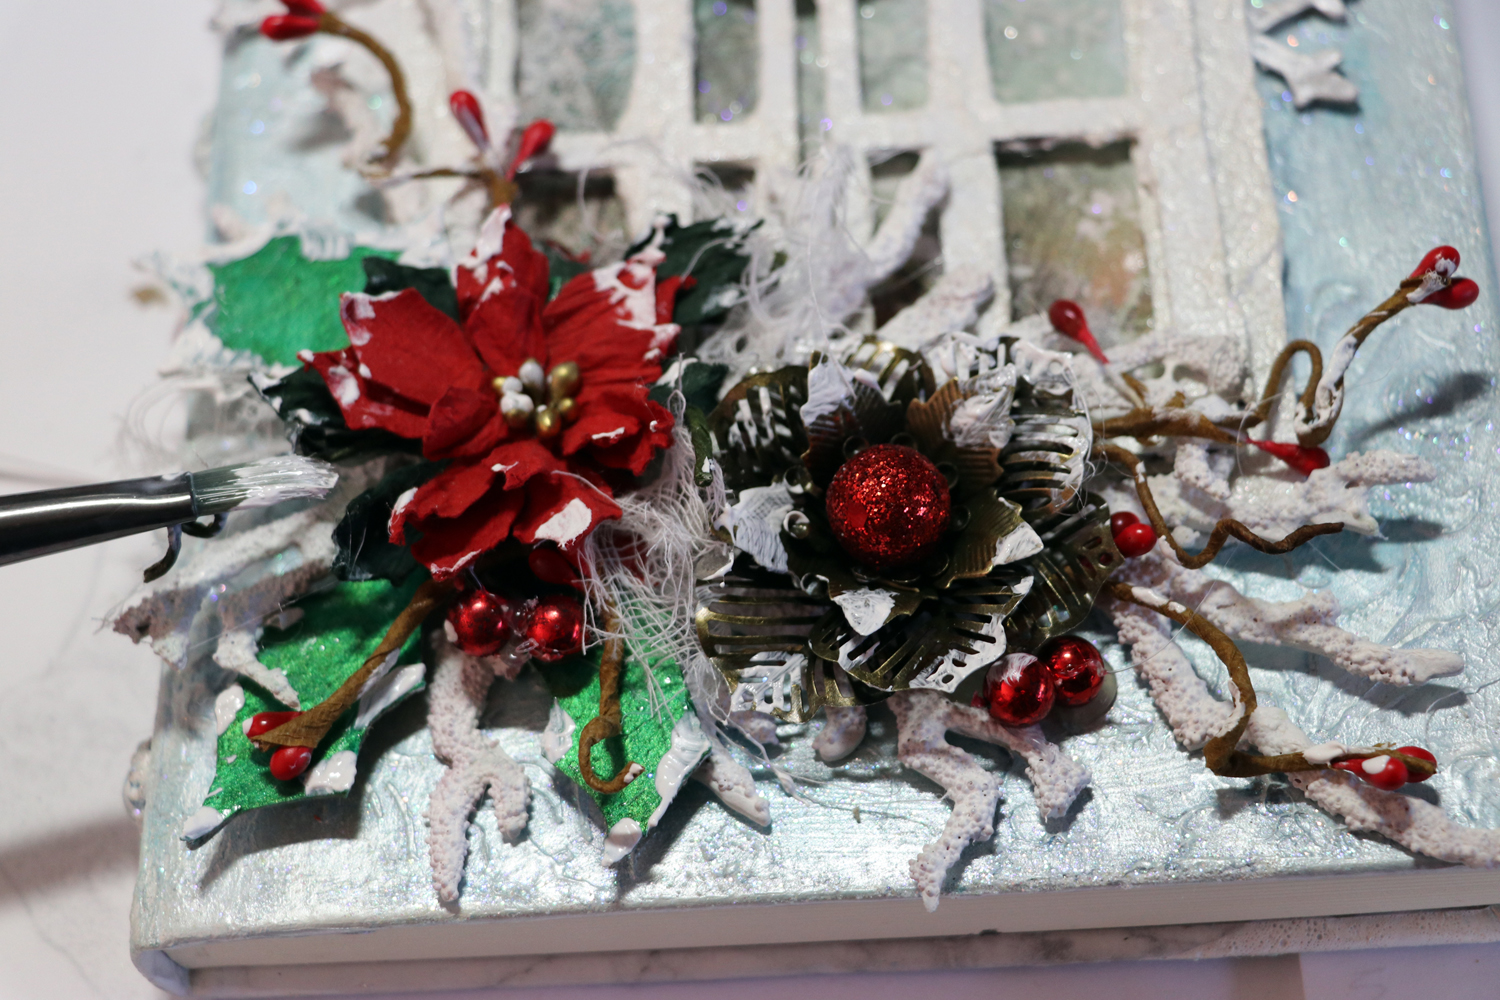
One of the last things I do to my flower cluster is add some faux snow
a mix of gesso and white glitter. I like to add it with a soft 
small brush.


My magnificent jewel is actually an earring that I bought 
really cheaply at $4.00 a pair, it makes a fabulous element to my book.
Always look outside the square for materials.


So first I have added texture, this time with just 
gesso and a stencil as I did not want the texture 
to be too deep and I wanted a softer look than texture paste.


When dry, I spritzed with a little turquoise glimmer mist
and dried it again, then with a fan brush and water
I painted the surface with turquoise inka gold.
Remember they are actually water soluble and a valuable 
paint medium, as well as a rub.


Then I have added some platinum inka gold, just rubbing
in with fingertips. Then to add sparkle
I have painted with a glitter medium.


I have die cut branches and painted with white 
gesso, dry off..


Cover with dimensional magic and sprinkle with micro beads.
When dry I have painted with white gesso again.
This looks like coral or a textured winter branch.


Paint the window arch with white gesso.


Mix up a batch of faux snow, 1 teaspoon of white gesso
and 1 teaspoon of white glitter, then smear all over the window
with a large wooden stick.


The snow flakes, I have painted with white gesso and dried, then
I have painted with platinum inka gold for a neat shine.


Start the layering process, by adhering patterned 
paper into the window (this is Highland Christmas my new paper range 
here)


Add the snowflakes and window frames.


Snip up the branches to include in the cluster at the 
base of the window.


Add poinsettia and metal flower 


Fill out the cluster with some red pip branches cut up
and some green chipboard holly leaves and muslin.


When you are happy with the cluster add
some faux snow to the flowers and branches, and 
add the red earring to the centre of the window.


Keepsake box 


Over the years I have collected a few vintage 
Christmas decorations and they are very precious to me, and 
it occurred to me that to pass them on to my children
they needed to be kept safe in a sturdy box.


So I have used chipboard to decorate an old tin box 
using lots of gel medium to adhere in place.


I wanted to keep it pretty simple in comparison to my 
books and canvases as this has a practical use and I don't 
need things catching or making it hard to store.


Once all the chipboard is in place,  have painted the box with black
gesso and then with graphite inka gold.


Then I have added lots of rhinestones and decoration, which
I have covered with Art Alchemy White gold wax for a pewter
look.


To give it an aged look I have stained it with rust 
alcohol ink, blot off the excess for a vintage rusty look.


Just the ticket to store my vintage ornaments in.
The sweet blown glass mushrooms I purchased at 
an old antique shop in South Australia
when I visited our lovely Jane Tragenza, 
she recommended the store and was right, it had 
everything  !!!


Happy Crafting 
and Merry Christmas to all
See you next year !!


Wednesday, November 21, 2018

November loveliness


Mad Hatters Tea Chest 
and 
Catcher of Dreams Layout 
By Sue Smyth 


This month I am sharing two projects I have taught around Australia this 
year, first is a small box for holding tea with an Alice in Wonderland 
theme. Second is a layout using my Artsy treasures and ID chipboard to 
Create a Dream catcher style layout.


I have cut down one of the borders to create a frame on the lid 
of a Graphic 45 kraft box 


I added feet (wooden beads) to give the box some height and 
definition.


The spine is decorated with a playing card and resin bracket.


Inside I have used torn up text to cover the kraft surface, (and the outside)


And I have decorated the tags that came with the box 
with Alice in Wonderland Artsy Treasures.


To top the box is a resin Mad Hatter, he is painted with Inka 
Gold colours and placed over the ID frame.


Next is my layout.............


I love doing a mixed media layout and intend to do more, I create 
my own background to suit the photo.


The ID feathers are painted with gesso first, then I give 
them a second stippled coat, and dry off 
to bubble and blister.
Then I have coloured them with Scribble sticks and water.


I have used the scribble sticks to colour the flowers too, and to colour
the compass ID chipboard.


I have snipped the compass/clock chipboard, around the 
centre to create 2 pieces, and threaded cotton 
around the larger one to make a dream catcher.


Here are some close ups.


Oh and I used the same elements (except the photo)
to make a journal cover. Which I secretly like 
even better lol.


Here are some close ups of the prills and 
feathers etc.


I hope you are inspired by my projects and bonus
book, and 


some of the chipboard used 


Happy Crafting