You Inspire Me layout
This mixed media layout of my son is is using a selfie my son took when he was six. Those were not the days of digital ..this camera was an old film variety..imagine my surprise when it was developed and full of shots of my inquisitive boy. I love the curiosity in his eyes, the genuine thirst to learn and discover, he is still like this 10 years later lol
To start with I have used a brick template and Viva Decor Stone Effect Paste, to get that sand stone look. Once dry, dry brush with gesso and spritz with Dylusions sprays. I wanted this layout to look more industrial than my last few.
The large cog I have sprayed with black paint, then dimensional magic, and sprinkled with Stampendous Silver shards, when dry chip off excess and swipe with Inka gold graphite and a spray with dylusions black.
To alter the compass first I have sprayed the chip with black paint. Add dimensional magic to the two raised edges and sprinkle with micro beads. Allow to dry. Then rub gold paint over the whole piece, to higlight the texture. To finish with a dry fan brush, flick gesso over areas of the chip, not much but just enough to highlight the four points.
The phrase I have sprayed black, then dimensional magic over the top, coat with black glitter and allow to dry.
The cogs, I have sprayed with matt black spray paint, when dry liberally smudge with Graphite, purple and cobalt Inka gold to get that iridescence that metals sometimes has.
My Banner
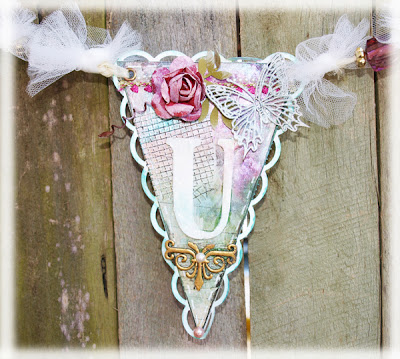
This banner was made for the June show here in Brisbane, I wanted something to say my name that I could sling over my work, and use later in my studio.
To create the pennant shape I have used Spellbinders Pennants, to cut lightweight chip into banners, and the Lacey pennants to cut the white scalloped piece. Cover the chip banners with patterned paper and decorate as you wish.
The bracket I have coated with Stampendous Aged gold embossing powder.
Use your crop a dile to place eyelets in each side of the pennant. Tie together with ribbon and add small pieces of soft tulle tie to each side.
Each pennant panel has had masking tape, and plasterers mesh added
over the top of the patterned paper. Dry brush with gesso and spritz with glimmer mists as desired.
I have added my favourite feather, simply spray black with spray paint, then with paint pen, draw in spots and lines over the top. Swipe with dimensional magic for a glossy coat.
Chipboard Used
Happy Crafting
dont forget to leave a comment to
be in the running for a prize on the Imaginarium Blog


Loving your banner, great ideas there....and your layout is gorgeous with all the textures and details :)
ReplyDeleteReally amazing work. I have a look at your blog quite often.
ReplyDeletethanks Wanda
ReplyDelete