Welcome to my Blog

Welcome everyone, I hope to inspire you and share some of my papercraft work. You can find out where I teach and what I am up to, what inspires me and what I am working on next. I love to share new ideas and neat ways of adding creativity to your pages or cards etc

my blog

Thursday, October 27, 2016

blog hop


Hi Bloggers 


It’s time for a Blog Hop!


Come and join the fun with the amazing Design Teams from Lindy's and Imaginarium Designs … combining their creative forces for a massive blog hop and it's starting RIGHT HERE and RIGHT NOW!


There are prizes galore and so many stunning projects to inspire you!  It's so easy to play along and be entered into the draw.    All you need to do is leave a comment on the Lindy's Blog and then hop on over and check out each of the designer blog posts (please leave them all a little love as they each work incredibly hard to bring you all amazing projects!) and finish over at the Imaginarium Designs Blog by leaving a comment there.
Prize Winners will be announced everywhere on October 30th - check back in to see if you are a WINNER.
Hop on over and check out these stunning projects using Lindy's and Imaginarium Designs products from our super talented Designers.
Lindy's Stamp Gang - https://blog.lindystampgang.com/
·         Marta Turska-Grochocka 
·         Amanda-Jayne Baldwin
·         Natalie May 
·         Tanya Palamarchuk
·         Cindy Brown 
·         Leonie Neal-Dawson
·         Djamila Khiter 
·         SoniaThomason
·         Miriam Haggar
·         Ekaterina Zenevich 
·         Karyn Schultz
·         Solange Marques 
·         Sue Smyth
·         Carol Theng
·         Caroline Elliam 
·         Louise Nelson
·         Belinda Spencer
·         Kareen Brochu Harvey 
·         Leeann Pearce
·         Yulianna Efremova 
·         Chitose Nakamae
·         Tracey Fowler
·         Kate Palmer 
·         Sandi Spink

I know this hop is MASSIVE!

Hop Starts: RIGHT NOW!
Ends: Sunday 29th, October 2016 - at the last stroke of midnight!
Winners Announced: Monday 30th, October 2016
There are 5 x $25 Gift Vouchers available from Lindy's Stamp Gang and 5 x $25 Prize Packs from Imaginarium Designs to win!

Winners will be drawn randomly from among blog comments.

Local and international entries are welcome - this hop is worldwide - a bit like our Design Teams!

To celebrate this awesome event, I have created this project using Lindys Stamp Gang Sprays and  Imaginarium Chipboard. You can find all the chipboard I have used at                                      http://www.seriouslyscrapbooking.net.au/


I have created another altered book for my blog hop, but this time
I wanted a softer look and a less gothic feel.
I wanted to do a fairytale and chose Rapunzel as this
was my daughters favourite when she was young. This
meant I could include some flowers too, which I love.


I have used Lindy's Stamp Gang sprays and powders to colour the 
The colours I have used are
Canna Lily Burnt Orange
Opal Sea Oats 
and Magicals Screamin Banshee black 
and Ramblin Rose Pink


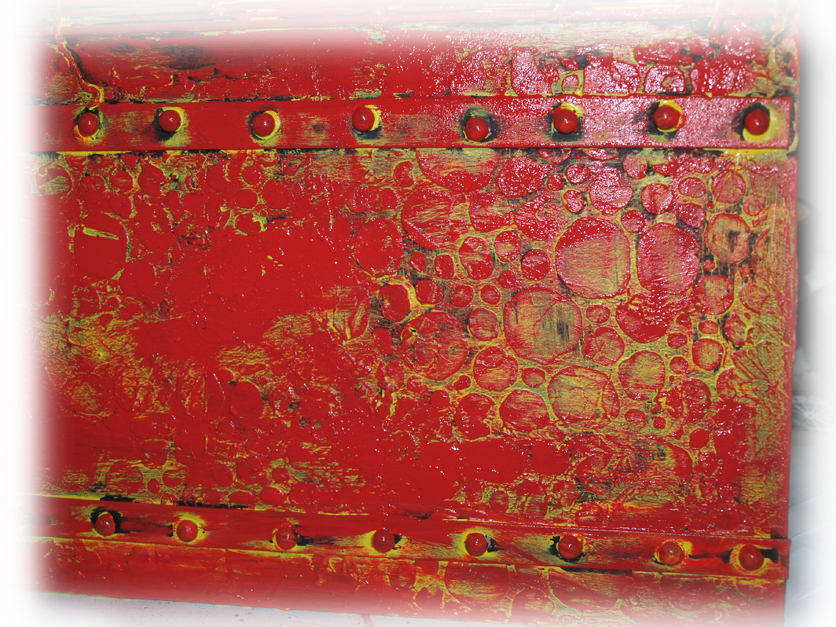
You can see I have applied the Magicals directly to the 
cover after I have layered over texture paste, white gesso 
and sprayed with Canna Lily Burnt Orange . I have sprinkled Ramblin
Rose Pink  Magical over the cover and spritzed. Then I added
Screamin Banshee Black after I have dried it to form the mottled look.


I have sprayed the muslin with Opal Sea Oats for a 
soft dyed look


A gorgeous lock on the side for that secret look.


Small alpha from Imaginarium are glued onto 
a scrap of chipboard to form a plaque.
This is then adhered to the cover.
I have sprayed this with Canna Lily Burnt Orange,
after it was painted with white gesso.
The rub over with gold metallic paint.


Here you can see the Prince chipboard shape, which
I have painted with matt black spray paint. 
Then I have rubbed over the top with
Screamin Banshee Black, which gives it an
almost purple shine.


The large plait is Sculpey clay which I have rolled into 
ropes and twisted into a plait. Then of course
baked it in the oven following the directions.
Then it has been sprayed with matt black spray paint
and rubbed over with metallic gold paint.

I have used Imaginarium Tulip Corners as leaves
I have sprayed matt black spray paint over the "Leaves"
and then rubbed over gold paint and spritzed with 
Opal Sea Oats and added a little 
metallic green paint too


Friday, October 21, 2016

More Spooky business

More Spooky Business 
By Sue Smyth 


Alchemy 
My projects this month all feature toys or things purchased
items, I have looked at them in a different light
and included them in a work with a theme.

Lately I have become quite addicted to altering books, and
I like to go with "it" when creativity strikes.
So I will bore you this time with 2 more books. 
The first one is Alchemy, as in the ancient
method of medicine and healing. It will 
fit nicely into my collection now.


One of the emblems of medicine is the snake dating back 
to Roman times, due its affinity to the Roman god Mercury or 
the Greek god Hermes. I wanted to include them, so I have
used small plastic snakes here, so I found just the 
thing in the toy section of Kmart of all places. It
is amazing what you can find if you look with 
an open mind.


The perfume vial, is an old one I was given years ago
but to make one yourself you could use a 
small glass one you can source in cheap shops 
and wrap a filigree trinket around it for a 
very medieval look. I have tucked 
a little dyed muslin and moss under it.  


I have cut a hole in the hard cover and ripped the pages
underneath to form a cradle for the bottle. This 
will mean less chance of breaking, later.
I have actually burnt the paper around the edge
with a fire lighter wand. I love the look, just be careful
if you do this, and keep a cloth handy to smother 
any flames !!! or a fire extinguisher!! 


The snakes have been painted black, I use matt black spray
paint, then rub over with inka gold paint, gold and purple, or
any colours you want. And I have added a 
metal handle, I always like the look of a lock or 
handle so the book looks as if it should be locked or secret lol.


The head is a resin piece I made myself, and again
paint it black then rub in inka gold..I have added 
a jewelry finding as a crown and dyed muslin for softness or hair
depending on which way you look at it.


This is a layered piece, I have started with 
the chipboard feathers, and a filigree trinket, then a resin piece I have made,
then tucked in some butterfly wings. To finish I have added a
gold jewelry finding to the top and a plastic pendant.
With a small brush add inka gold to the areas you want for a 
colourful shine.. 


The title to my book is chipboard alpha, adhered
directly to the book, and painted along with the background.
When done, I have rubbed over with copper inka gold 
to highlight it from the background. Then I have
added liquid pearls to the alpha, like they
are actually nailed to the cover, very effective I think.


Down each side, after I have applied texture paste to the cover
with a bubble stencil, I have attached 1 cm strips of chipboard.
Then I have adhered acrylic dew drops, to resemble larger nails.
See my Mini tutorial on the cover below 

Sting 

My next book has another theme, it is called Sting
after the dagger, and has a pirate theme.
The dagger is a plastic kids toy, and the pirate
coin came in the same pack.
Both are spray painted black and rubbed over 
with gold inka gold.


I have cut a chipboard clock in half and adhered each
half to the top and bottom of the 
cut out cover.


Again like the first book I have torn out the pages 
around the knife, and burnt them.
I have tucked died muslin around the knife to 
hide the rough edges.


I love adding a lock to the side of my books, this time
I have hung a small tassel from it.


The pirate trinket adds to the theme, and I have 
scattered gold coins and buttons around the
cover, they then have been painted 
black and rubbed over with gold inka gold.

Altered Coffin 

My third project is a little altered coffin, not something
you say everyday lol.
This is a MDF piece which I will pop on 
my Halloween table.


The base is decorated the same as the books.
with a layer of texture paste applied over stencils.
while it is wet I have added some chipboard shapes, in this case cogs.
Then it is painted with black gesso and rubbed over with 
assorted metallic inka gold  
I have added some dimensional stickers to it,
the Owl and the Wicked sign,


The centre piece is a resin frame and 
a metal Hogwarts badge, which I found in 
a souvenir shop. 
You can see the cogs around the sides here, and the 
braid that is affixed to the sides.


The feathers are painted black with matt spray paint,
then I have flicked a little Stampendous aged gold 
emboss powder over top and heat set.
This gives a hint of gold over them.


The Hogwarts badge was silver, so I have 
rubbed gold inka gold over top to match it in
with the feathers.


Then I have added the spiders and 3 d stickers to finish, 
with one of Shakespeare's quotes, one of my favourite from Macbeth

This is the first step in altering a book.
You can cut a hole out from the cover, using a template 
and sharp blade. 
In this case I have added the chipboard and acrylic dew drops 
to the sides.
And I wanted a interesting spine, so I have used here
a sushi mat. Make sure you glue the twine
connecting the bamboo first so they do not unfurl too much.  


When the texture paste is dry, paint it, this time
I have used layers of black gesso, then yellow and finally red
dylusions paint.


The I have dry brushed black gesso over the top again.
This may seem like a lot, but it is all about the layers 
of colour and each colour will show through in 
small pieces here and there to give the cover tremendous depth. 


Then start with gold metallic spray, I have used a prima spray.
as a base. Then rub in inka gold, in your favourite colours. 
Adjust the colours as you go to match your trinkets,
by spraying a little here and there as needed.


The feathers are sprayed matt black, they I have rubbed 
over Stempel Farbe, by Viva Decor (the same company as Inka Gold)
in purple, this has a fine glitter to it and makes the feathers sparkle


The snakes are sprayed matt black first, then painted with gold inka gold
and a small brush.
Then add colours as desired for a metallic sheen. 
I found if the plastic snake was misshapen like 
the green on in this picture, you could heat it with
a heat gun a little and it would flatten and fall into shape.
Just dont inhale the fumes lol

Happy Crafting 

This is how I use my altered books at Halloween


Monday, October 17, 2016

Boy stuff


Boys Stuff
By Sue Smyth 

Hi Bloggers 
Today I am sharing the layout I did for the boy challenge on the Imaginarium blog 

My boy layout is based on a Wordle, kind of a puzzle with words as the background


I have used left over alphas to create a series
or words that reflect boys, and adhered them to basic cardstock


Then I have painted with gesso
and sprayed with Lindys stamp gang sprays for colour


for the cogs I have spray painted black with a can of matt spray paint,
 then added mini art stones with dimensional magic
 and rubbed over with copper and green inka gold


I have added smaller words, that have been spray painted matt black


here the corner is embossed with 
Stampendous aged copper..perfect for this look


the black and white butterflies help soften
 the look and add a natural element to contrast with the cogs and metal


I have cut several trinkets in half and layered above and below the photo


add a few trinkets, the branches help soften the look of the layout

Happy Crafting all