Spooky altered book and
Trinket box
By Sue Smyth
I managed to acquire a lot of old encyclopedias, which are great to
alter and also do a class, because everybody has the same as a base.
This book I have altered as a Halloween decoration.
I have used an old plastic skeleton as the centre piece and for
a set of layered wings I have use metal wings from Imaginarium and 2 sizes of the
monarch butterfly.
I really wanted to use one of the corner flourishes, but had
none left, so I have used the negative of the chipboard
to apply texture paste to give the same shape. See my mini
tutorial below.
My skeleton (Jack) rests on a bed of bubble wrap and muslin.
I have clustered a bunch of Imaginarium trinkets
around Jack. I have chosen any trinket that
fits the them, clocks anchors, heart and wings etc .
I painted the skeleton with gesso before laying him to rest.
for the wings I have painted them black with spray paint
then rubbed over purple metallic paint on the edges, along with a tiny
sprinkle of gold stickles
Add some luminous rhinestone eyes to Jack and a metallic crown.
Add old keys, lock panels and I even found a skull and
cross bones in my stash, along with skull beads.
Here is a mini tutorial
Cut a rectangle panel out of the front of the book.
Adhere some of the first few pages to the back of the cover
for a base.
So if you have ever found yourself wanting to
use a certain chipboard and you have none
left, here is how to fake it.
Use the negative to apply texture paste, like you would a
stencil. Allow to dry and work away as normal
I have added plastic braid and other chipboard, corners and
cogs.
To add texture I have used a palette knife to apply
texture paste and once applied pull up the texture
paste to form peaks.
I have painted the whole book with Dylusions purple grape
paint, leaving little peeks of red showing through.
Once dry paint over with black gesso.
Rub over with Graphite inka gold for a metallic sheen and layer
over metallic gold paint, then decorate as you like.
Imaginarium Chipboard used
Trinket box
My next project is a little trinket box, as I love to make the
for friends and family as gifts.
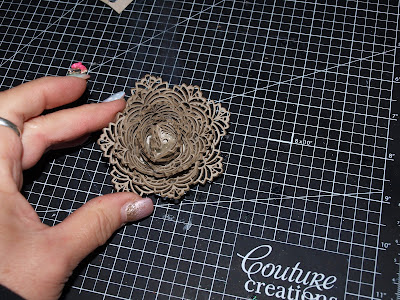
This time I have used lots of Denises Art deco embellishment
flourish to make a 3 D rose, as I had a lot of them and wanted
to use them up.
I have a mini tutorial below.
Once the rose is constructed I have
sprayed it with black spray paint.
Then burnish with gold and purple
metallic paint
The end effect matches the metal trinkets I have used too.
Start with a disc of scrap chipboard.
Dampen all of the chip flourishes with
a quick spray of water.
Bend them into curved shapes and hot glue onto the
scrap.( it is important to not spray too much water on them
as they will not adhere down well)
Keep building offsetting each of the "petals"
Make as large as you like
So it looks a little like a crown
Then spray with black spray paint or any other colour you like and
use on your trinket box.
Imaginarium Chipboard used
Happy Crafting


