Welcome to my Blog

Welcome everyone, I hope to inspire you and share some of my papercraft work. You can find out where I teach and what I am up to, what inspires me and what I am working on next. I love to share new ideas and neat ways of adding creativity to your pages or cards etc

my blog

Wednesday, April 30, 2014

imaginarium blog hop


Imaginarium Blog Hop challenge

CHALLENGE CRITERIA
Its all about celebrating that
'ONE OF A KIND'
extraordinary someone, something, experience or event!
see details below 

Adore My Girl
By Sue Smyth


My contribution to the sketch blog hop is this layout, filled with 
chip and soft colour and a few tricks which I am sharing below.

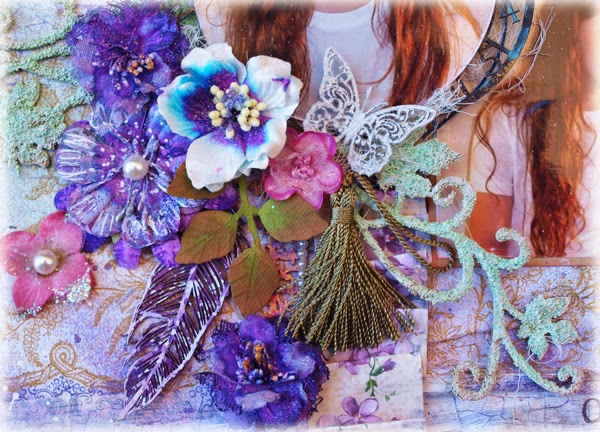
I love to cluster items together. Here are some altered flowers chip and gorgeous 
tassel, my favourite thing this year.
The chip feather I have inked with archival ink. Then flick 
white dylusions or you white paint pen over the top
add details with white paint pen. 
Spray gloss krystal cote over the top, sometimes
this will alter the colour of the white, which I quite like,this time
it has picked up the purple base of the black ink.

The gorgeous flowers are altered with spray inks. The azalea
I have misted with water, and simply added purple spray mist with
a small pipette only to the centre. The wet flower will
wick out the colour, and in this case the pigments will separate 
the blue in the flower is purely accidental and the pigments of the spray 
separating out. 
The other flower I have sprayed and dried off. Once dry
draw lines on the petals with a white paint pen and dots around
the centre, add a large adhesive pearl for effect.

For my flourish this time I have painted with gesso first. Then coat
with dimensional magic, and sprinkle with micro beads, any colour.
Allow to dry and paint with gesso again, nice and finely no clumps please.
When dry spray with Lindys stamp gang green mists, I like to mix 
the greens. Allow to dry again and sponge
onto the tips with Worn lipstick Distress ink! for a 
soft look to the ends of the tendrils.

The lovely pleated paper adds structure to the layout. Simply
trim cardstock to about 3  or 4 cms. Wet with water and 
pleat with your fingers. Dry with heat gun, manipulating with 
your fingers as you do.
I have randomly brushed with gesso, and sometimes I even
sew down the centre of the pleated paper for added stability
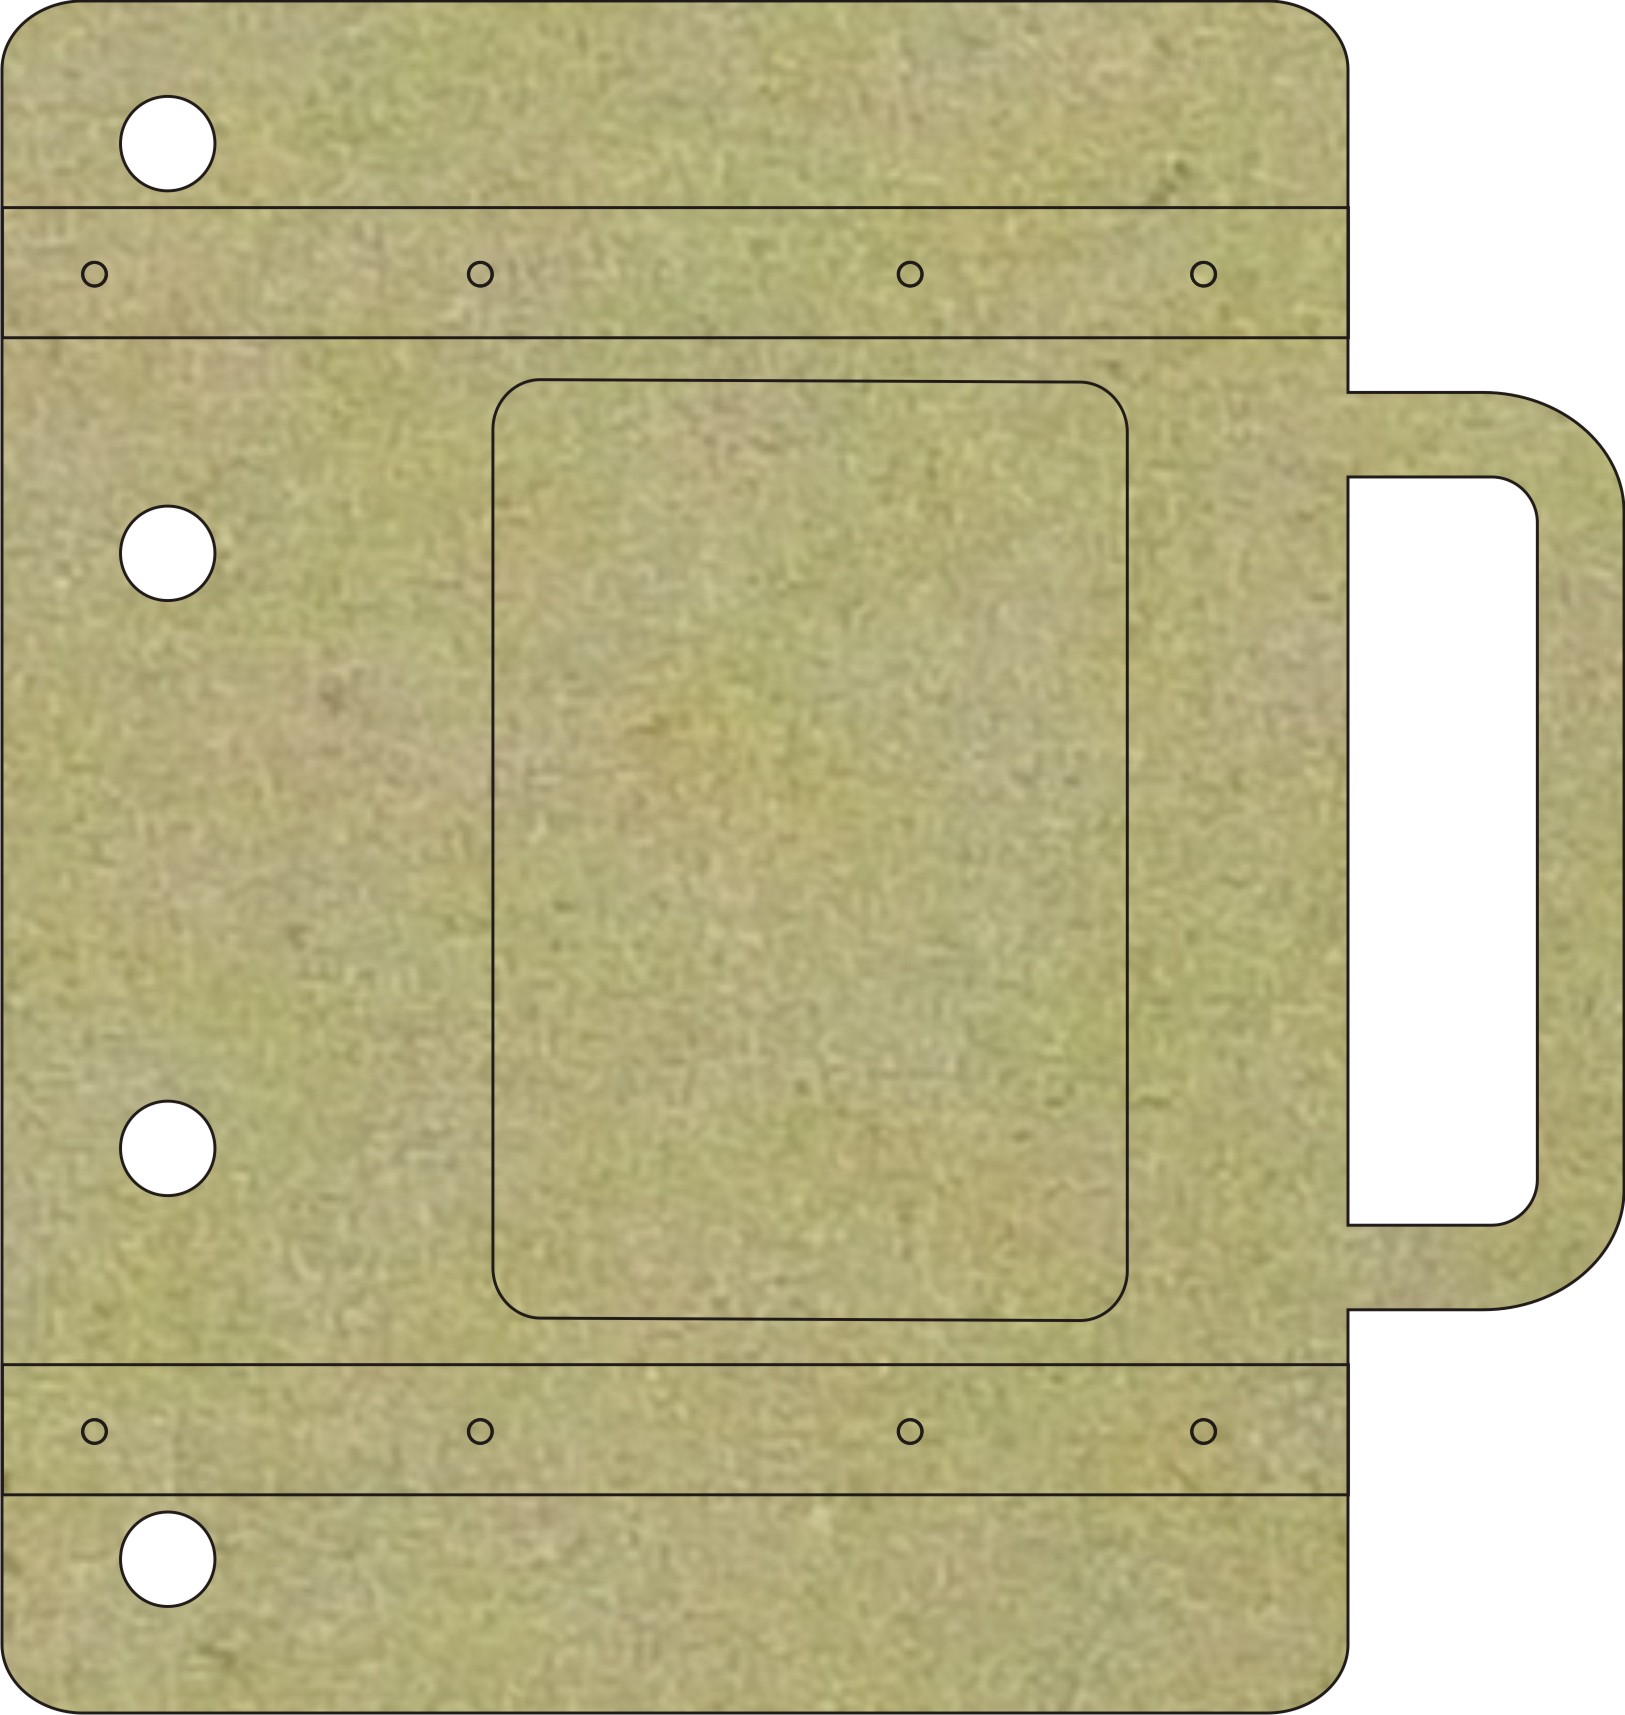


Chipboard Used  

Happy Crafting 

Okay so here is the...
CHALLENGE CRITERIA
Its all about celebrating that
'ONE OF A KIND'
extraordinary someone, something, experience or event!

THEME
You can of course scrap about your beautiful mother,  the experience and wonderment of motherhood or maternal bonds that are the glue that keeps your family together, but lets keep that optional. You may instead want to scrap about something extraordinary or that special something because its unique and there is nothing else quite like it. Or alternatively you could include the phrase 'ONE OF A KIND' in your title work, journaling and or quote.

PICK A TEMPLATE
You must use one of the 5 sketches from the 'ONE OF A KIND'  Page Drafts Release #30.
 You may rotate the sketches any which way your heart desires however your creation must remain as close as possible to the original sketch design. 
NB: You are more than welcome to submit more than one page, digital, traditional, cards and canvas are all welcome
so long as your project clearly shows a sketch has been used from release #30.

FOLLOW PAGE DRAFTS
If you havent already, follow both the Page Drafts Blog by clicking on the followers tab above and follow the Page Drafts Facebook Page . Do the same for Imaginarium Designs Blog along with the Imaginarium Designs Facebook Page.
NB:This is crucial to submitting your entry and being in the running for one of the 3 prize packs.

SHARE YOUR CREATION
Share your finished project no later than 31st May 2014 Australian EST on the Page Drafts facebook page, you can only do this if you are following the Page Drafts page. The page will then be featured and shared in the special 'ONE OF A KIND' 2014 Album. This is where the judges will be able to view and deliberate over your beautiful creations.
NB: If you do not use facebook thats fine, simply email your pages to justagirlwithideas@hotmail.com
or alternatively if you blogged about your artwork link us up in the comments field below.

This competition is open to everyone everywhere!


Saturday, April 26, 2014

Megs Garden Fairy Spotters Journal


Fairy Spotters Journal  
By Sue Smyth 


Do you believe in Faries at the bottom of Garden?
This cute little journal is just perfect for those who believe.
I plan on giving this to a young lady who is collecting 
photos and cards of fairies.


I have started with a plain mini album 
and carefully cut an oval from the front cover.
Then just cover with Damask Garden papers, I like 
to use Gel medium to adhere the papers down securely.
Dry brush the edges with gesso and spritz with a contrasting glimmer mist.


I have added a Megs Garden chipboard frame.
First I have painted it with Gesso, several coats
gives a good finish.
Then I stamped Sepia archival ink with a 
text stamp all over the surface.
When dry cover with Dimensional Magic and sprinkle
a small amount of white glitter.


I have altered the gorgeous azalea flower, spray it with water
then either spritz carefully in the centre or 
do as I do, use a pipette to drop a small amount spray ink into the center.
The wet flower then wicks the colour out from the center
for a neat natural look.

When dry spray with spray adhesive 
and sprinkle with a little white glitter.


I have covered each of the panels inside the album with 
papers from the Damask Garden set.
Then matt fairy panels with Kraft cardstock and 
adhere to each panel 


Make sure you include some of the poems in the Fairy panels

Megs Garden Materials 

Added Materials 
Imaginarium wrought fencing
fancy brads 
extra flowers 
pearls and pearl brad
Kraft cardstock
Chipboard album 

Happy Crafting 


Wednesday, April 23, 2014

Couture Creations Stitched with Love Canvas

Stitched with Love Canvas
by Sue Smyth 

I love to make a mini canvas, this tiny little works of art
 can be a great way to try out a new technique, as well 
as making a sweet gift for someone.
The Glamour Days sewing dies are the perfect way
to make a sewing inspired canvas. 

To make the faux canvas, cut sturdy chipboard to 6 x 6 inches
cover entire surface with mesh tape, masking tape, canvas tape
and even muslin. Adhere with gel medium and allow to dry
Coat with gesso, dry and spray with coloured inks.


The dress form can be embossed with the existing pattern on
the die, by running through
your machine with a rubber mat, after cutting .
But you can also run the die cut through
your machine with an embossing folder for an
alternate pattern


For that aged look to the sewing machine, 
scissors and bobbin I have embossed with
silver embossing powder.


First cut the die out with light weight chipboard or 
recycled cereal packets.
This can be easily done with most of the Couture Creations 
Dies and makes a great way to produce
lots of your own chipboard shapes.


Cover surface with an Embossing medium stamp pad.
Remove shape to a clean sheet of paper.


Then sprinkle with embossing powder, the clean
sheet will mean you will not waste powder on the 
excess embossing fluid on the scrap paper.


Heat set to a high shine.
Handy Hint
Make your own aged embossing powder
just mix gold, black and silver fine embossing powder
together and store separately.

Handy Hint 
For a really high shine, emboss again 
when the first layer has cooled. 


Couture Creations Materials 


Happy Crafting 


Monday, April 21, 2014

imaginarium


Easter Egg and Button layout 
By Sue Smyth


Happy Easter Everyone!

To celebrate I have made a chip Easter Egg!
My goodness where do I start with this one, there is so much chipboard I have 
used, forgive me if I miss some lol 
But here goes !

I wanted to create an Easter egg decoration using the Sweet Sentiments from Graphic 45
I have memories of an Egg my mother made my grandmother
when I was a small child. This fondant frosted iced egg was kept in a
sealed jar, I would look at it all the time when I 
was at Granny's house,
 and loved the glittery look of the surface and soft pastel colours. I wanted to 
capture that look with this project.  


Over the years I have kept little bunnies, moss and eggs, and 
I got to use all of them for this project.
I have also used gesso, white glitter and white puffy paint for that
icing sugar look.

I love to make a project that will last and become a heirloom.
To use the Graphic 45 images, adhere them to cardstock or 
light weight chip first, they will not buckle with age as much.

Some close ups for you to enjoy. The frosted banner I have painted with 
gesso and inked the edges, then spray with adhesive and sprinkle with 
white glitter, oh and stamp first though !
I love how the spray makes the stamped letters run a little!

Simply paint the dandelion and butterfly with gesso, spray with Olive 
glimmer mist. Allow to dry and ink the tops with purple ink.
Ink the edges of the butterfly too, and spray with adhesive 
and sprinkle with white glitter.

Add some glittered eggs and a bunny. You can find these
in cheap shops around Easter.

This cutie I have kept for a long time, he is a resin bunny from Prima I think.
I have added some cute little red mushroom,s again something I have
tucked away and discovered again in my stash.

Shabby up a metal rabbit trinket with gesso, for the glittered girl simply paint
with white gesso, add a few coats for a good coverage, and 
cover with dimensional magic, drench in white glitter and allow to dry.
 This is my favourite way to alter chip lol

Add teased Muslin and a tinsy little bunny brad.

To create the Oval base I have simply cut 2 ovals from 
strong chipboard and trimmed out with a box cutter knife.
Cut a slit in both, one oval with it at the top and the other with the slit
at the bottom. Slide one into the other. Cut a circle from
chipboard as well. Paint with gesso and
then decorate. 

Chipboard Used


Button Layout 


My layout this time is featuring buttons. I have loads of them
so sometimes it is good to use up a lot of them at one time.
Because they will be heavy though, adhere the whole layout
onto 12 x 12 chipboard.

Adhere lots of buttons to cardstock with a layer of Texture paste.
Paint with gesso and allow to dry. Spray with glimmer mists or 
dylusions sprays to alter the colour of the buttons, here
I wanted to create the look of a sky.

The clouds are painted with gesso, cover with dimensional magic
drench with glitter, when dry spray with Lindy's Stamp gang 
gag me with a silver spoon gray 
This will give the clouds a stormy look!

With boy layouts you can use flowers, but here I have not used
many  of them and they are not fussy flowers and the 
colours are muted and natural. Add a few
embossed cogs to counter act the flowers.

A simple treatment of chip this time, randomly paint with 
gesso and spray with brown dylusions spray mist. Dry with a 
heat gun, I find the puddles and imperfections
are captured better this way, and some of the chip will
actually darken due to slight burning,
 a good rustic look, but don't take it too far !

Another simple way to alter chip is to just spray with black
spray paint, I like matt or satin spray cans. For the flourish
I have sponged a little silver metallic paint over the top.
For the door embellishment I have used the left over scrap beside
the door and trimmed it to look like a french door, then randomly embossed
so some of the chip shows through for a rustic look.

Handy Hint
The perfect little white dots are the waste left from punching a doily punch.
Spray the area you want them to be, with adhesive and sprinkle 
with the tiny confetti.

Chipboard Used 


Happy Crafting 
and don't forget to leave a comment on imaginariumdesigns.blogspot.
to be
in the running for a prize