Welcome to my Blog

Welcome everyone, I hope to inspire you and share some of my papercraft work. You can find out where I teach and what I am up to, what inspires me and what I am working on next. I love to share new ideas and neat ways of adding creativity to your pages or cards etc

my blog

Wednesday, June 24, 2015

megs garden


Vintage Flower tags 
By Sue Smyth 


Hi Bloggers
I love a sampler, and this time I wanted to use shipping tags,
along with the Forgotten Meadows papers.
A sampler is a great way of making a lot of
mis matched and left over papers 
work together. It is also a good 
way to use up left overs or card packs. 


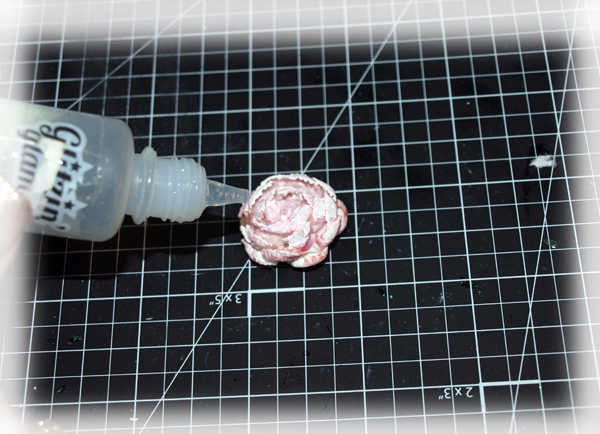
The pink rose tag did not need too much to embellish,  I have 
added Dimensional magic to the edges of the rose petals
and sprinkled over with white glitter to frost the edges.


I always adhere my paper butterflies to white cardstock
for strength and this time I have added a little glitter to the wings.


Trim the extra leaves off the lacy flower, ( use on another tag)  and adhere tiny
adhesive pearls to the stamens in the centre for 
a little depth and shine.


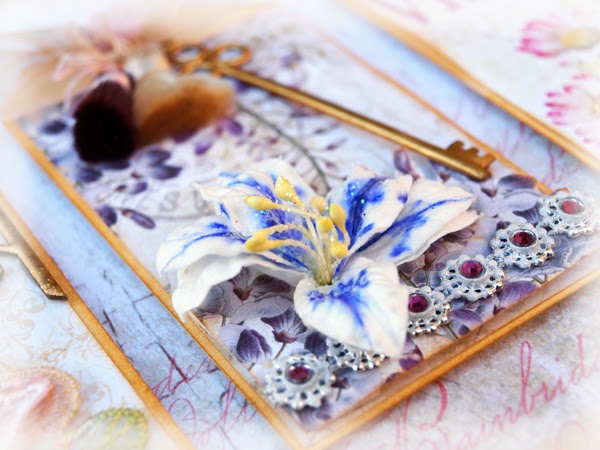
To get nice colour on the Azalea, simply draw a line
down each petal and spots around the petals with a Tombow or water
soluble pen, then spritz with water and dry off with 
a heat gun.


Of course I have added a faux cameo, by die cutting a 
gorgeous vintage lady, cupping it over a mouse pad
with a stylus and adhering to a glittered scalloped 
oval with 3 D foam tape. Add small pearls one at
a time to achieve that gentle oval curve.


These tags are large shipping tags I have
 cut down to fit on the page nicely.
And I have inked all of the edges with Distress ink.


Apply a small amount of white gesso over the 
silver plastic trim to soften the harsh silver sheen.
It looks way more vintage then too.


Again add a little gesso to the bracket and trim for 
an aged vintage look.
Add pearls and bling for shine.


Adhere each tag to the background with 3 D foam tape.
Or like me use scraps of chipboard to raise them 
up nicely.


Add a small rhinestone to the centres of the 
silver plastic trim, after you have added
a little gesso. It looks just like a mini
brooch then.


Add some fussy cut flowers, again cup the centres for a 
dimensional look and add small 2mm rhinestones for 
the centres.


Rub gesso over the wings of the blue bird to pick up the 
detail.


Megs Garden Materials 


Happy Crafting 

Monday, June 22, 2015

pink layout

Pink layout for the girls 
by Sue Smyth 


A quick share with you all today, this is a pink layout done using 
the mood board below...


Check out the others at 

Happy Crafting 

Sunday, June 21, 2015

imaginarium

Fantasy Canvas and 
8 x 8 album

By Sue Smyth 


Hi Bloggers
Today I am sharing a fantasy canvas I made for the June show Tutor display.
I just wanted to make something for fun and see where it would lead me.


I have started with a skinny canvas and some old paint brushes, I thought 
they would look good as a skirt and went from there to make a 
body with the corset chipboard, some wings and a small
dolls head.


I have double embossed the wings with gold emboss powder
 to give a nice lustre.


3 Feathers are placed over the paintbrushes to fill out 
the skirt, I have painted them with white gesso, 
sprayed with red dylusions and dried off.
Then I have rubbed over with gold paint, sprayed
with gold spray glitter  and 
added dots of gold liquid pearls.


To colour the brushes, I have painted them
with white gesso and sprayed with red dylusions.
then when dry rub over gold paint


For the top I have layered a selection of trinkets.
To colour randomly swipe with white gesso
and spray with red dylusions.
Wipe off any excess to leave colour in the crevices 
and detail of the trinket.


The corset chipboard is embossed with an embossing 
folder first, then painted with white gesso and sprayed with
red dylusions as well.
When dry rub over with gold paint, I have also 
added a layer of Dimensional magic for shine too.

Imaginarium Chipboard 


8 x 8 Album


For this project, I wanted to make an album for my sisters 50th Birthday
but I did not want to fill it with photos, as I will leave
that to her. So inside is just plastic pockets with 
cardstock, waiting for any photos she chooses.

I have covered a purchased album with paper towel and
gel medium, add white gesso, dry off and spray with 
your choice of colours to make a great
textured base to add your chipboard and flowers.


Like the project above I have stuck with a gold theme.
Chipboard is either double embossed with gold embossing powder.
Or sprayed black with matt black spray paint
and rubbed over with gold paint.


You can see in this photo the difference these two techniques
give, the title is double embossed and the flourish below is 
sprayed and rubbed over with gold.


Add a cluster of flowers 


buttons and 


bows to make it nice and girly and you are all done.

Imaginarium Chipboard 


Happy Crafting all 


Thursday, June 18, 2015

Hearts Ease Tea light card

 Hearts Ease Tealight 
Card
by Sue Smyth 

Here is a sweet idea for all of those card makers out there.
This is a fold out card that holds a tealight, which is a lovely
gift to give anyone.


I have cut an oval window in one side to see the decorated
tea light in side. Then die cut a scalloped oval frame to
go over top.


Decorate the sides with smaller panels of Victorian labels die
and Scalloped & Nested circles for the centres.


You can personalize the greetings you put on the sides to 
suit you.


Then tie it all up with tie dyed seam binding. You can light 
the candle with the box folded up or down. 
As hot air rises it will not burn the sides, but if you are
worried, just pop one of those battery tea lights in instead!


Follow the little step by step below to alter your flower.


I have also altered the leaves the same as a previous post, with
gesso and distress inks.


Couture Creations Materials 


Step 1
paint with a smidge of white gesso, and dry off.


Step 2 
Apply Distress ink with a finger dauber all over flower 


Step 3 
Spritz with a little water (not a lot) and allow to ink to blend.


Step 4
Dry flower and apply glitter glue or white glitter.
This will give you a  pastel frosty looking flower. 


Happy Crafting