Reverse canvas and
Large Sampler
Large Sampler
By Sue Smyth
This month I have made a two off the page projects.
The first is a reverse canvas, with a Rapunzel theme.
I have used a cheap plastic doll and a small
book and altered them to fit nicely into the reverse side of the canvas.
I have used lots of pink/burgundy roses to decorate the frame
after I have added lots of texture.
See my tutorial below on how I have made the background
texture.
The window is painted with gesso using a stippling
motion, when dry I have rubbed gold paint over the top to
pick up the rough texture.
The butterflies are painted with Starlights paint
using 2 coats to give a good colour.
Here I have used a negative as a corner
Rapunzel herself is painted with gesso, then I have
spritzed with black dylusions, mopping off the excess.
Then I have rubbed over gold paint. and spritzed
with pink dylusions and mopped off excess.
Lastly I have dabbed a little white gesso to
give a frosty look.
Rapunzel sits inside the window and needed a
little base to sit on, so I found a small book
at the second hand store which has been glued
together (open) and affixed to the canvas base.
I have added some splats of black dylusions around Rapunzel
and over the window.
Here I have tucked small pieces of green moss
into the flowers, I love this stuff. it is so bright and
just the softness I wanted.
The bracket is painted with white gesso, and then gold paint.
Then I have rubbed a little pink dylusions over top in places
which looks a little like opal if you do this randomly.
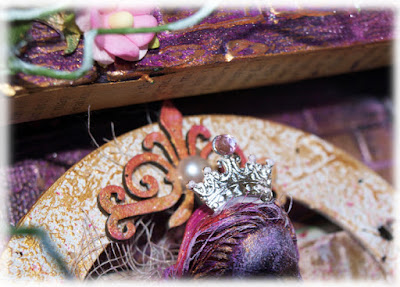
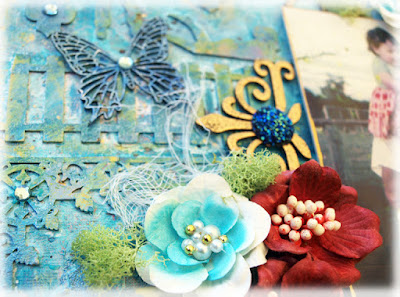
Here are some close ups
French Wooden Sampler
My next project is a little different for me, not so much
mixed media and paint lol .I found this
wooden frame at Kmart of all places and could just
see it decorated in a number of ways.
I have used Graphic 45 Gilded Lily, as I have had the paper
pad for sometime and was busting to use it.
The chipboard is either double embossed
with Stampendous aged gold emboss powder. Or
glittered with Praline glitter.
I have used lots of scrap chipboard to raise up
all of the panels and give lots of dimension.
The oval frame, is gilded with mega flakes
for a really good shine.
I have painted the butterfly, with Starlights paints.
Love the Kates doily all covered with
dimensional magic and glitter.
3mm pearls are added around the oval's edges.
I like to add extra glue to each pearl to make
I like to add extra glue to each pearl to make
sure they stay put forever.
Adding texture to the Canvas
I have added texture with texture paste and
a brick stencil to the reverse of a canvas.
Then I have painted the canvas white with gesso.
Nesxt it is painted with black gesso, getting
right into the crevices of the brick.
Dry the gesso with a heat gun, and allow it
to blister and bubble.
Then I have dry brushed white gesso over the top
again, this is to allow the coloured spray to show up.
Paint the book, window and doll with white gesso.
Use a stipple motion on the windows to give texture.
So when you rub over with gold paint (or other)
the texture shows.
Now spray with pink dylusions and dry with heat gun.
Rub in pink and graphite inka gold, for a neat sheen.
Now rub in gold paint for added shimmer.
Decorate as I have above or do your own thing.
Imagniarium Chipboard


Happy Crafting


