Bling Princess and decorated Pringle Tin
By Sue Smyth
Hi Bloggers and friends
This is my contribution this month!
I have had this foam head for a while in my workshop.
And have had a lot of ideas running through my
head as to how to alter it.
So finally this is it.
But I need help!
If anyone has ideas on what to call it
please leave a comment.
I kind of thought a bling princess or android, but
it is kind of mermaidish to.
Except it has wings, so I am not really sure
what she is ...lol
I have had so much on lately, I did not even
take photos of it as I was making it.
So sorry no little tutorial.
Instead I just took lots of
photos for you to enjoy of the details
To start with any styro foam, you must paint
it with a PVA based glue. This protects it
from any chemicals that may eat the foam.
You can then use this as a base to paint
with gesso and decorate as you would a canvas.
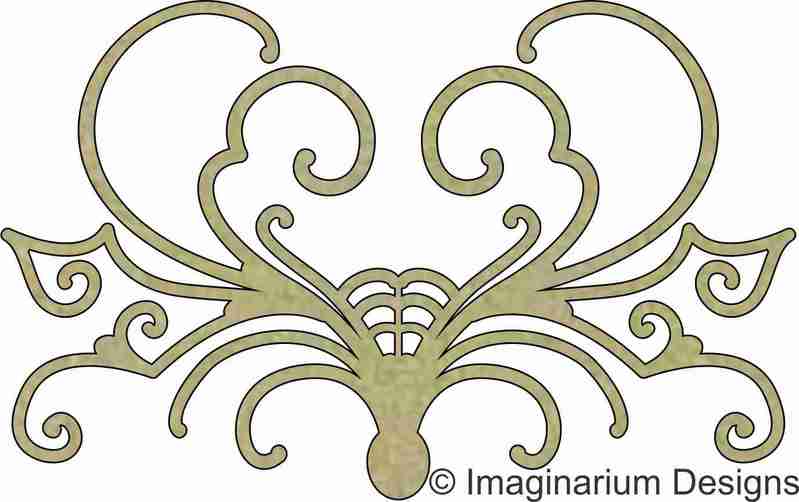
I wanted to make a crown, and started with a corner flourish
and a metal trinket. But as I worked I kept adding things and that got a
little lost.
I had lots of long pearl hat pins,and just kept
putting them in until I was happy.
Then I found large rhinestones and pearls in my stash
and had to include them.
And some awesome glass tiles.
It is funny how you find more and more things that
suit when you rummage through your stash.
I have used Finnabairs gold roses, which if you
paint with gesso and spray come up like a
metal rose.
I have also used chipboard either side as a vine
or leaves, always consider
snipping chipboard up.
To adhere chipboard onto a curve, first dampen it with
water, then adhere with PVA type of glue.
In this case I could insert pins to help it bond.
I love how some of the styro has almost
changed into a reptilian look.
I have used false eyelashes and pins for eyebrows to give the
styro head a little character.
I did not just want to decorate the
head, that would have been predictable.
So using the fact that chemicals will
eat the foam, I cut a hole in the head
and sprayed paints and glue into it
until I had a nice eroded look.
Then I have added cogs to look
like the inside workings of an Android brain!
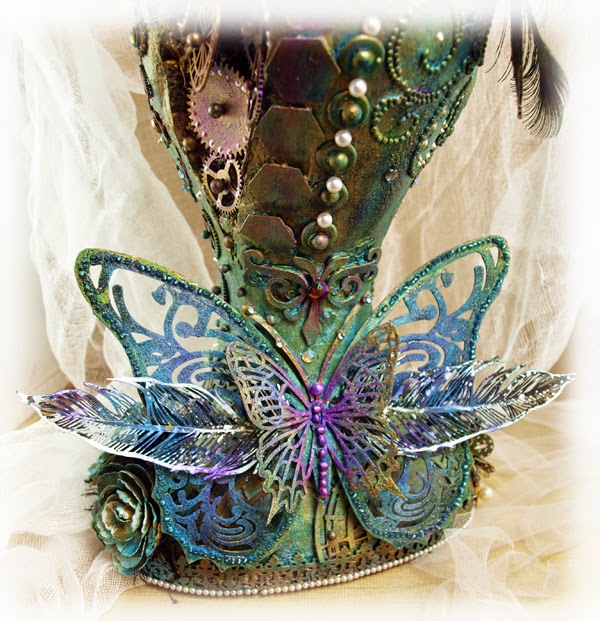
The back must always look nice too.
I have used the large butterfly, feathers and a smaller
monarch butterfly to create a set of layered wings.
First I have painted them black, with spray paint.
Then I have layered over metallic paints, rubbing
them in with my finger. Around the edge of
the large butterfly I have adhered small beads
for texture.
The feathers have lots of white linen dylusions
flicked over them before I have rubbed
in metallic paint.
Nice close up of the brain cavity !
Again the cogs have been painted black first,
then gold and purple metallic paint rubbed in.
Once in place I have used liquid pearls to add
details.
I have used the peacock feathers as my colour palette.
When adhering rhinestone swirls
add a little extra glue to give a great bond,
as often the adhesive is not strong enough.
I have added old earrings, beads and rhinestones for
texture and shine.
Here I have used the hexagonal chipboard,
both the positive and negative pieces as
a base on the head. To soften
the look, I have sprayed muslin and
tucked it around the back an sides.
Add lots of bling to the head piece for a rich look.
Here are some of the chipboard shapes
but there are probably too many to remember
Imaginarium Chipboard
My next project is a
humble pringle tin altered.
First cover the tin with and gel medium and layer
over hand towel or textured wall paper.
When dry then coat with gesso, and spray with inks
as usual.
Rub over with gold paint to highlight the texture.
I have painted the heart with gesso first, then sprayed
with Red dylusions, then coat with dimensional magic.
Sprinkle with red micro beads and allow to dry.
I have snipped in half to use it.
I love using glitter as a colouring agent, it is not just
for sparkle.
For the doiley I have painted it with gesso, inked it
with turquoise ink and coated with Dimensional magic.
sprinkle with turquoise glitter and allow to dry.
The glitter will sink down into the Dimensional magic
and you will have very little glitter shed.
Add lots of pearls as a contrast and some black
eyelash fibre.
Happy Crafting
Don't forget to leave a comment !!!


.JPG)

