Altered books and mini Canvas
By Sue Smyth
My last blog post was an altered Gothic book, for Halloween and I loved
it so much I had to make another one. This time featuring a
plastic doll turned into a steam punk fairy.
I was inspired by a play my middle son was in this term called tour of
the damned, so my book is called Voyage of the Damned! Which
is a movie I think!
My fairy has added resin wings along with a chip butterfly
set of wings, I love doubling or tripling the wings for a
great look.
I have covered the book in texture paste and chipboard pieces
first then painted with black gesso.
Once the gesso is dry I have rubbed in graphite inka gold.
Then built up layers of other inka gold colours, including copper
turquoise and purple.
For a sparkling look add a little Viva Stempel Farbe it
is great as a rub too.
Add lots and lots of trinkets, don't be scared to
over do the trinkets. I love converting
Trinkets into crowns, clothing and wings.
Add some pearl strips and paint over with
gold paint and assorted rhinestones and
pearls for spooky eyes.
When you are done paint the sides of the book
with gel medium and when dry add a coat of gold paint
this will seal the book shut along with all of the pages.
No need to adhere each page at a time!
Chipboard Used
My next project is also a book,
but with a difference.
Decorating a book is a great idea, but not always practical.
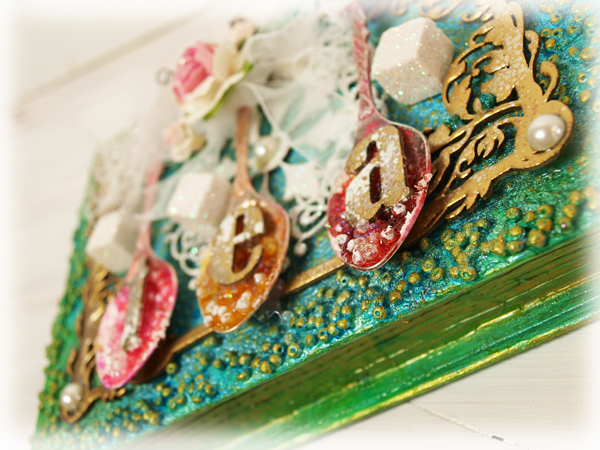
So this time I made my book a box, way more useful, to hold
teaspoons in.
So of course I decorated it with teaspoons. I also
made faux sugar cubes, which I think look so real and almost edible.
See my tutorial and step by step below.
Each spoon is filled with a spray of dylusions,
dimensional magic, white glitter, diamond dust
and seed beads. It will set to into a frosty sugary spoonful of
coloured texture.
Add a pretty bow and rose to the central spoon
for a shabby chic look.
Faux Sugar cubes.
1. Cut square balsa wood (available from hobby stores) into cube shapes.
2. Insert a tooth pick or bamboo skewer into the bottoms of each.
3. Paint with 2 coats of white gesso.
4. When dry, paint with Dimensional magic.
5. Carefully dip into white glitter, and dry.
6. Remove skewers and adhere in place
Take a hard cover book and gut the centre
with a sharp blade.
Cut strips of chipboard to fit and hot glue
to the base to form a box.
Add more hot glue around all of the edges to
make it sturdy.
Then cover the entire box with torn strips of old pages.
adhering in place with gel medium.
Keep building with layers making sure to cover
the joins to make it sturdy.
This is the end result when painted with gesso
sprayed with Teal dylusions and rubbed over with gold paint.
Chipboard used
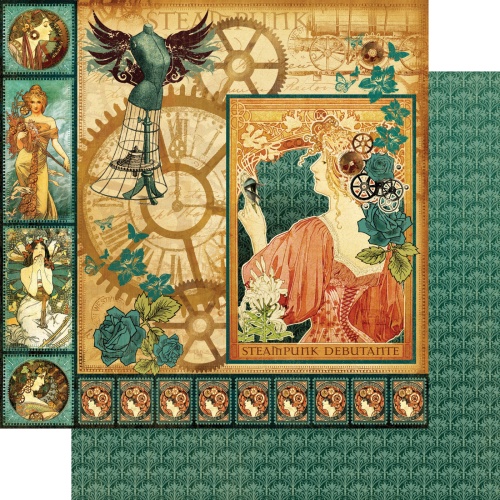
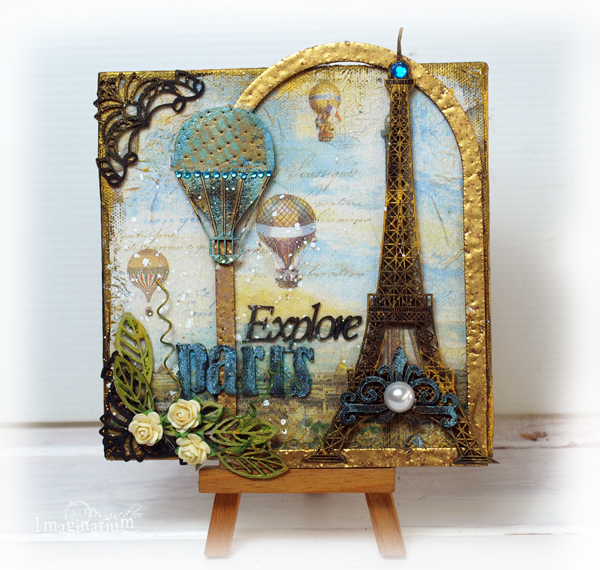
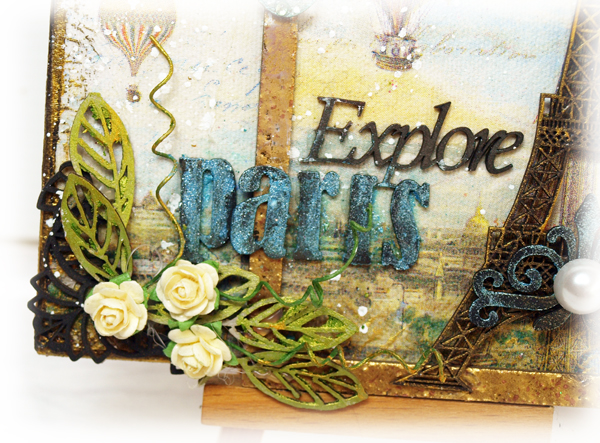
My next project is a small 6 x 6 mini canvas to
celebrate Paris.
I have painted most of the chipboard with Matt black
spray paint and rubbed over with gold paint.
You can then layer over other colours of inka gold
including Stempel farbe which has a glittery look.
The back ground is simply a serviette that has
been adhered to the canvas with gel medium. Thanks Jane lol!
Chipboard used
Happy Crafting