Welcome to my Blog

Welcome everyone, I hope to inspire you and share some of my papercraft work. You can find out where I teach and what I am up to, what inspires me and what I am working on next. I love to share new ideas and neat ways of adding creativity to your pages or cards etc

my blog

Thursday, May 22, 2014

Couture Creations cameo Card 2


Ooh La La Cameo Card
By Sue Smyth 


Today I am sharing a simple little card with a 
classic cameo look.
Pink, Black and Gold are a perfect colour 
pairing 


Emboss Co-ordinations cardstock with Velvet tea lights embossing folder.
Sand raised areas to create an intricate pink pattern 
with Couture Creations Sanding block .
Trim to fit the top of an A5 black card.

Trim striped paper from Damask Delight paper pad to fit 
the bottom of the card front.
Add tasseled trim and moonlight adhesive pearls.


Die cut  Royal oval frame from lightweight chipboard
or recycle cereals boxes. 
Emboss with gold embossing powder, for a lush
look emboss twice.


Use the waste shape from the die, to roughly
trim out an oval from scrap pink cardstock. 
Emboss with embossing folder, then adhere to the back of the oval frame.


Smear Hot pink Glitz in Glamour inside the frame 
and allow to dry.

Die Cut Devonshire lady from black cardstock, 
flip over on a mouse pad, apply pressure with
 Couture Creations precision stylus  in 
circles to emboss the cameo.

Couture Creations Craft Tools

Adhere in place with 3 D foam tape.
Add bow to finish a classic card

Couture Creations Materials 

Happy Crafting 


Couture Creations Cameo Card 1

Devonshire Delight
By Sue Smyth 

This is one of my favourite card shapes to use. The flap created
in the front is perfect for slipping a long stemmed flower into, a little
trinket or lucky ticket.


To start, cut Black cardstock to 30 x 14 cm.
Score at 11 cm and 22 cm.


Trim striped paper from Damask Delight paper pad to fit card front.


Create a triangular flap by marking the mid point on the side
and drawing a diagonal line to the score line at 22 cm
Cut to create a triangle.


Emboss pink Co-ordinations cardstock with Velvet Tea lights
embossing folder.
Use card flap to draw a line on embossed card.
Cut out and trim to fit. 


Adhere cardstock and paper to card as pictured.

Die cut  Royal oval frame from lightweight chipboard
or recycle cereals boxes. 
Emboss with gold embossing powder, for a lush
look emboss twice.


Use the waste shape from the die, to roughly
trim out an oval from scrap pink cardstock. 
Emboss with embossing folder, then adhere to the back of the oval frame.


Adhere to card front with 3 D foam tape.


Smear Hot pink Glitz in Glamour inside the frame 
and allow to dry.

Die cut white cardstock with Chandelier lace border
trim and affix to side of card. Add pearls 

Die cut Devonshire lady from black cardstock, 
flip over on a mouse pad, apply pressure with
 Couture Creations precision stylus  in 
circles to emboss the cameo.


 .Adhere in place with 3 D foam tape.

Add bow to finish a classic card


Couture Creations Materials 


Wednesday, May 21, 2014

imaginarium


Canvas and Layout 
by Sue Smyth

This month I am sharing a special project with you all,
that I created for the upcoming Scrapbook and Papercraft Convention.
in Brisbane

This is a large canvas and the subject this time is me.
I don't usually like having myself as the subject, but in this instance 
I wanted a piece of art work that described my approach to 
my work for the show.

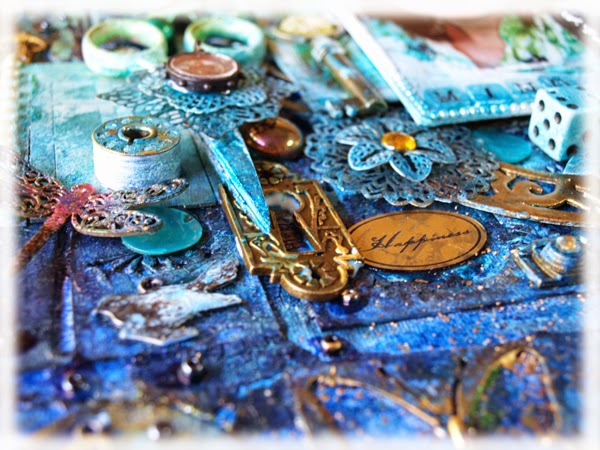
There is so much chipboard in this piece I don't think I will
even try to list them below. But I am 
sure I have finally used over 100 pieces on on work. 
Perhaps one day I will sit and count them lol


First I started with a blank canvas and covered it with 
negative chipboard and some left over pieces.
I glued them in place with gel medium.
Once dry I gave it a coat of gesso to create 
a textured base to work on.


Then I sprayed it with many layers of Dylusions, glimmer mists
and paints. This creates a rich depth of colour.
I have adhered a selection of trinkets, embossed chipboard
buttons, wood veneers and beads to the 
canvas with gel medium


I added my favourite things, Scissors, paint brushes,old palette and much much more. 
Before I have adhered each piece I dry brushed it in gesso.
Then to finish I have sprayed it again with my selection of sprays.


I have added black gesso to the sides and rubbed over the edges 
and textured areas with gold paint. 


Here are some nice close ups of the Chipboard pieces and trinkets


The fun part of this kind of work is adding little bits to it
each day and seeing it grow and change. 
I can keep adding things over time if I like. 
Provided there is a perfect space for them. 

Some things I have left to last and adhered them when 
the canvas is dry, so they will stay a metallic colour


I love tassels at the moment, so had to add one, which of 
course has a splash of ink on it.

Angel wings from an old toy and recycled paint brushes
are added.


Of course one of my fav birds is an owl, so had 
to have one surrounded by old trinkets and bits
I have had stored for years.


This gorgeous trinket is an old earring, can you believe 
we ever used to wear things like that lol
And can you see the spray top of an old paint can,
I use them all the time so it had to be added.


Next 

My Favourite Girl Layout 

A sweet layout of my girl with her first guitar.


Not as much work in this as the canvas, 
but hopefully you will enjoy it too. 
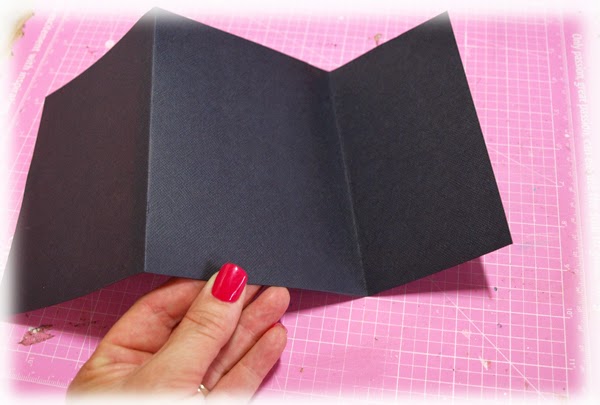
I have used the Moroccan screen as a mask before spraying
matt black


I have actually treated the chipboard quite simply in this layout
and sprayed them matt black with a spray can.


I have cut the clock and trinket in half and placed either side
of the photo to bind the photo and layout together.


Add a few tassels, beads and of course flowers and you 
have it. Layout finished.


Thanks all for now

Don't forget to leave a comment to be in the running 
for a prize.
And we all love reading them 

Happy Crafting 
and see you at the June show!!

Wednesday, May 14, 2014

Megs Garden 2

Treasured Memories Layout
by Sue Smyth 


When my daughter was younger she was happy to pose for the camera 
for me, this is one of my favourite photos.
I could not resist creating a layout that reflected the colours and 
feel of the photo.


I have altered the Mia flowers by, dry brushing the centres with gesso.
Allow to dry and then spray with Cross your heart glimmer mist.
Dry off with a heat gun.
Spray with a little spray adhesive and sprinkle with
white glitter..
I cannot live with out white glitter lol


I love to create a laced bodice look, I have used an die 
that cut holes in a long strip, cut a large V in the paper and 
adhere the strips to the edge.
Lace with thin ribbon, tie of in a bow. 
Add scalloped lace or paper to the sides 
and add a row of pearl strips over the join.

To alter the butterfly I have adhered the transparency to 
white cardstock to intensify the colour.
Use large tape or jac paper to adhere, as 
some glues will corrode the printed image.
Then fussy cut as normal.


To alter the Azalea flower, I have spritzed the flower with water, 
add a drop of lemon glimmer mist with a pipette.
The wet flower will wick the colour from the centre.
When dry spray with spray adhesive and sprinkle with white glitter ...yes again !


Add a delicate tassel to the bottom of the laced bodice for 
that rich historic look.


Megs Garden Materials 

Imaginarium Chipboard
Wrought fence and Treasured Memories phrase

Happy Crafting