Welcome to my Blog

Welcome everyone, I hope to inspire you and share some of my papercraft work. You can find out where I teach and what I am up to, what inspires me and what I am working on next. I love to share new ideas and neat ways of adding creativity to your pages or cards etc

my blog

Thursday, May 28, 2015

Couture Creations layout


Love that Sweet Smile Layout
by Sue Smyth 


I have not done a layout for awhile and thought it was long overdue.
Using Heartsease papers and Couture Creations dies, I came up 
with this lovely Baby layout, but you could use it for any
young girl.


I have altered the Couture Creations flowers
with a wicking technique.
I love the graduated colour you can achieve with this technique.
You will find a tutorial on my next post to explain how to 
wick colour into the flower.


I have coated die cut cream cardstock in dimensional magic and covered
it with white glitter to give a praline colour to the glitter.


I love tie dyed seam binding, so easy to do
and it sits nicely above a torn element.


A nice close up of the flowers, insert a pearl into 
the centre for a bit of bling.


Tuck in some teased muslin to soften the look


I have die cut the pram twice and glued both together
to form the thickness of chipboard. Then when
you add dimensional magic and glitter the die cut 
holds it shape better and will not warp.


I have done the same with the little rocking horse.
But notice the little leaves and pearl above it. An embellishment
can be made of the smallest things 


Die cut Smile script in white cardstock and 
wipe over pearl paint for a classy look.


Here I have spritzed the flowers and used a pearl paint
pen to blend over the wet petal.
The pen will bleed and dissolve for a neat soft look.


Altered Strawberry Leaves

Lately I have been having fun playing with
ways to alter die cut leaves.
First cut them from white or cream cardstock


Swipe over top of leaf a little gesso, not much 
just spots of it.


Use a blender to add Peeled Paint distress ink.


Use another blender to add Worn lipstick to the edges of the leaf.
You can leave this technique here, as it looks awesome 
this way too.


But I like to spritz with a little water, too.
This sends all of the ink to the back and allows the gesso to
stand out again.


The two inks blend and puddle to form lots of delightful
autumnal tones.


Couture Creations Products 


Happy Crafting  

Thursday, May 21, 2015

Imagnarium post


Wordplay layout
 and Home Sweet Home Bird house 
By Sue Smyth 


One of the things that I find a problem is what to do with left over
chipboard alphabet (well not really a problem lol)
So I decided to use up most of mine in 
one swoop!


I have adhered 3 layers of assorted chipboard letters, on to 
a sheet of cardstock, first do one layer, then paint with gesso.
Then another layer and gesso and again another, with the last 
layer take more care where you place each letter
so you can see the letters underneath too.


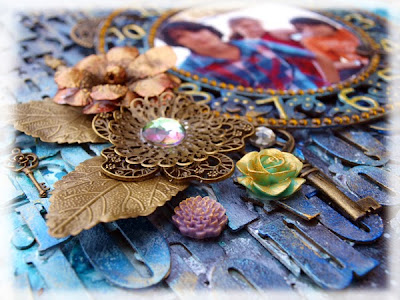
I have added metallic embellishments and a few resin roses. 


To decorate the clock first I have sprayed with black flat paint
then rubbed over with metallic paints and rubs.
I have adhered rows of the small rhinestones around each 
edge, then used liquid pearls to highlight the numbers.


Here you can see the 3 layers of alphabet chipboard.
Once painted with gesso, spray with calypso teal dylusions and flick 
lots of splats of black, white and London blue across the surface.
Have fun and play until you get the look you are after.


Rub over with lots of metallic paints and rubs 


Add a title, this time I have double embossed the word 
with gold embossing powder, this gives a nice full lush look.


Lastly dry brush with gold paint for a great patina 


Imaginarium chipboard used 


My next project is a bird house. I love bird houses, and have 
lots of little ones. I realized I did not have  a
life sized one. So I decorated an old one
I had bought a long time ago.


I have altered the outside of the box with the Vaseline
technique I used in the paling fence project.
Then added lots of pearls flourishes to the sides.


The roof has texture pasted added to give lots of depth
like the shingles on a roof.


Then paint the fence with 2 coats of gesso and cover
with dimensional magic, sprinkle with white glitter
and apply pearl strips to the top and bottom, for a glorious
picket fence.


I have added a few twigs from the garden, along with a 
craft bird, altered flowers and a faux nest.


To apply small pearls to the heart shaped opening, simply cut 
strips into 2 pearls each and adhere with a fine line 
of glue this is a little fiddly but, this way you will be able to follow the 
curve and achieve a lovely beaded edge.


To alter the feathers
1. Spray feathers with Brown dylusions and dry with heat gun.
2. Paint the tips of the feathers with white linen dylusions
3. Paint stripes across the feathers with Black marble dylusions.
4. Then take the top off the white dylusions and tap the straw with a paint brush so
the the ink flicks across the feathers nicely.


Imaginarium chipboard used 


Happy Crafting 


Wednesday, May 13, 2015

Scrapbook and papercraft Expo


Just Beautiful
Mixed Media Canvas 

By Sue Smyth 

Hi all
Well it is nearly that time of year again!
I cannot believe how quick the year has gone 
and we are all now busy prepping for the show/


I thought I would share a few sneak peeks to entice
you all to come along 


You will learn some neat tricks to altering chipboard.
Adding texture to a canvas and playing with colour 


We will play with Dylusions and learn 
how to burnish with gold


Alter resin pieces 


Play with trinkets and chipboard


Add texture with braids and lace 


And alter flowers with spray adhesive and glitter. 

If this sounds like your cup of tea, there are a few spots left 
just jump on line and book