October Spookiness
By Sue Smyth
I love decorating, whether it is for Halloween or Christmas
so each year I make a spooky book to
use in a Halloween display.
I have been experimenting with lashed binding
on the spine and wanted to incorporate it in this project.
This year I wanted to do Dracula's Diary and I had the
idea in my head for most of the year.
I wanted to use fangs and bats and trinkets along
with a neat key or two.
Here I have embossed one of the chipboard swords with
Stampendous aged silver embossing powder, it is
great for covering chipboard and is even better when
done twice.
The fangs were painted black, then cut in half.
then rubbed over with gold paint,
I have stuffed the top of them
with shredded muslin.
I have painted the trinket with black gesso, let sit
for a minute or two then wipe 90 percent of
it off with a baby wipe for a better
antiqued look.
My boys love dragons, and I found in Kmart
some plastic dragons and a mini castle play set(see below)
and thought this would make a great 3 D top for a box.
I love the texture of the castle, once you
paint it with black gesso and add colour over the top
the texture is enhanced.
I love the vibrant dragons eye, quite by
accident I put lots of black seed beads
around and they kinda covered the edges
like the eyelids of a dragon.
The head I cut off the toy and glued onto the
top of the castle.
I wrapped black fibre around the base and
pushed into the glue to add strength.
That lovely Dragon eye.
The wing I wanted to have a red tinge to it
so I have added red inka gold over the top of the blue and
purple inka gold.
This is toy set I used...so cool
The base was a box from Couture Creations Seasons Greeting
set
Add you layer of texture using chipboard and
adhering it down with gel medium.
After adding a layer of texture paste with a stencil
that resembles scales, I added the Emma frame
but cut it up to fit.
Once you have all of your texture on,
paint with black gesso, I think
this is kind of nice even with out the
next layer of paint.
Now dry brush with after midnight Dylusions paint.
This gives the box a bright blue hum under the
final layers.
Then dry brush cobalt inka gold over top with a fan
brush.
Then add spots of purple and green as desired.
Finish with a final layer of Art Alchemy Metallique gold wax.
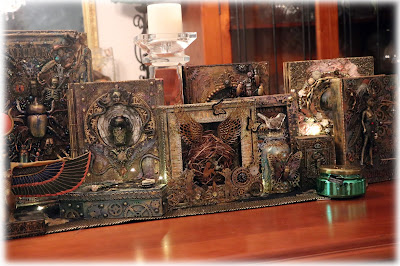
I have included a few photos of my altered book display for
Halloween.
This is why I do so many, they look cool on display dont you think?
Happy Crafting
From Sue


No comments:
Post a Comment