Paint brush and folder of love
By Sue Smyth
Earlier in the year I taught a class on an altered paint brush. Paint brushes
have been "done" before but this is my take on it.
A nice close up of the cluster of metal trinkets
And I wanted to include a photo in my version
Here are a few more close ups
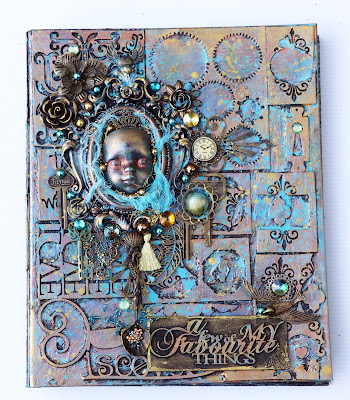
My Next project is a folder
I wanted to make a folder that I could store either flat items in (in plastic folders)
or mixed media A4 panels, see below.
Here are a few close ups
I used one of my favourite techniques, adhering the negatives of chipboard to the folder, then painting with black gesso.
Then layer over the colours you like ending with inka gold.
A panel is great for backing a fragile phrase, it then looks like a sturdy plaque.
Paint all of your elements with black gesso too.
For my layers of colour this time I have used
a wash of inka gold turquoise
Then rubbed in some copper inka gold. and added a few
spots of colour
And a few more spots of matt colour over top.
Rub Vintage gold alchemy wax over the black items to pick
up glorious details. And adhere onto cover with gel medium
I use gel medium as it has a lot of "flex" when it dries
so items do not "pop" off as much. And it holds things well
while working. Start the drying process with a heat gun
and let the rest happen naturally.
I have added a resin face in my frame, but you could easily do a photo
or a cluster of metal elements.
I have not listed the chipboard I used this time
as there are so many.
Happy Crafting all


No comments:
Post a Comment