A Quick Make and Take
with Artsy Treasures
Make two sweet
vintage projects, a card and tag, using Artsy Treasures by Sue Smyth, a range
of hand selected elements perfect for mixing and matching with any paper range.
Suitable for cardmakers, art journalers and Scrapbookers alike, and in a never
ending variety of themes for all to enjoy.
Tag
Card
Materials
Tag, patterned paper and
ephemera sheets
Ribbon, trinket, paper
flowers, muslin, rhinestones, dimensional magic
Inka gold platinum, scribble
sticks or gelatos. Dimensional tape.
Trim tag to fit patterned paper panel. Trim out corset lady tag and
paint with gelatos or scribble sticks. Punch hole in tag and tie off ribbon.
Roughly cut
out butterflies, frame and key. Colour in the butterflies with gelatos or
scribble sticks and fussy cut key. Cut centre out of frame with fine scissors.
Apply dimensional magic over frame, smear out with fingertip and allow to dry.

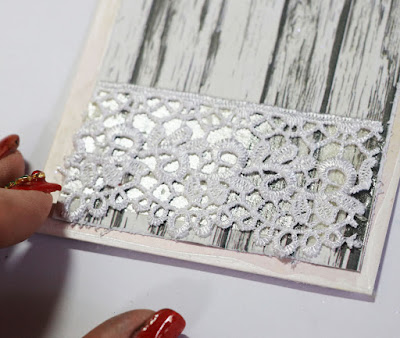
Adhere lace to bottom of tag. Cover butterfly with dimensional magic too
and allow to dry.
Adhere
panel to tag with 3 d foam tape and tuck key into the left side. Layer frame
onto left side, adhere muslin over top and cluster flowers and small sequins.
Add trinket and gem. And then adhere both butterflies to finish. Add a small
pearl to centre of key
Next is a simple card
Materials
White a5 card, patterned
paper, ephemera sheets
Butterfly trinket, ribbon, and
dimensional magic and white glitter, foam tape
Adhere patterned paper panel to front of card. Cut out lilac panel with
deckle scissors and adhere to side of card with 3d foam tape. tuck ornate frame
underneath on the right side. Fussy cut floral element, take of the finer
flowers as pictured.
Fussy cut bee, smear dimensional magic over top and sprinkle with a
little white glitter. Trim out part of the bee panel as pictured. Adhere floral
element to right of card with 3d foam tape. Tuck bee frame piece under the
bottom and another to the top as pictured.
Tuck piece of ribbon to the left of card. Adhere bee over raised
flowers, add metal trinket butterfly to finish.
Happy Crafting


No comments:
Post a Comment