Snips and Snails
and Chrysalis Canvas
By Sue Smyth
This month I have a layout for you all, I have gone off layouts lately, as my children are
older and do not offer the photo opportunities they used to, I dont have
the never ending stream of photos I used to.
But recently I launched a range of Ephemera sheets, which can be fussy
cut to use on layouts, Art journaling, cards and any mixed media projects.
Basically never ending uses, so I am re inspired.
One of the sheets features Boys, from the old poem we learnt as
kids, "snips and snails and puppy dog tails, that is what little boys are made of
This was the inspiration for the collage sheet and my layout.
They work perfectly layered over chipboard, and elements.
The chipboard I have painted with flat black spray paint
and then rubbed over with Art Alchemy Vintage gold wax, this gives a
great detailed shine and colour.
I have snipped up the large honeycomb chipboard (painted black again)
this way you can add structure to your page with small elements of the larger
design.
Then I have fussy cut lots of elements and clustered them around
the chipboard and photo.
Dont be afraid to tuck things under other elements, you dont have to
see all of the item to have an impact...see the half butterfly..
it is still a powerful shape and element.
I like to fussy cut things with a little white edge, no matter what
I am cutting, this gives you room to make a mistake lol.
Again dont be afraid to tuck chipboard under other elements, this feather is
painted matt black and then I have flicked runny white gesso over top.
This makes it look like a magpie or guinea fowl feather, much more
organic than just a plain feather...and the black and white has a great
wow factor.
Pages like this only work when you have good clustering skills, if you think
you are not great at it, practice,you can learn this skill with practice I promise lol
My next project is a fairy canvas, but I thought it ended up looking
like a fairy emerging from a pupa like a chrysalis, so that is
what I called it.
The wings are rather special, a little technique I developed, you can
see a mini tutorial below.
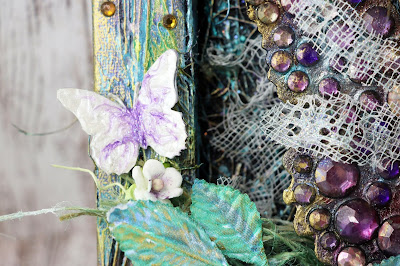
And it is a great project to use up all your old rhinestones
Even leaves can be painted, here I have used emerald Inka Gold with water
and a soft bristle brush. Then I have rubbed over Vintage Gold Art Alchemy wax.
Love making butterflies, and I have used this technique before, paint
the chipboard with white gesso, then apply white liquid pearls over top.
I have used Couture Creations Cotton ball here, while still wet, apply a
purple liquid pearls and a toothpick to swirl it around the white,,then let it dry.
It will take a while but the end result is stunning ,,dont you think.
You can also see another technique here the gossamer fairy
wings , made from muslin.
The toy doll has been wrapped up before painting and altering, let your
imagination go here.
To a large generic chipboard butterfly apply white texture paste.
The take your time and add random rhinestones, pushing
into the texture paste.
When dry, paint with black gesso, allow to dry for a few
minutes the wipe off most of it.
Wipe until you are happy with the effect.
The the magic happens, rub over
selected colours of inka gold.
I have used turquoise, violet, magenta, and lastly gold.
Then to finish I have added a few drops of alcohol ink
they dry instantly, but you can rub in with a soft small paint brush
they taint the colour of the rhinestone.
This way you can alter the colours of rhinestones you
have used to suit the project.


Happy Crafting All


No comments:
Post a Comment